Ramble On

Showing posts with label Recipes. Show all posts

Wednesday, December 2, 2015

The Fall Soup

Some of the Thanksgiving traditions we enjoy is the curried butternut squash soup I have been making for the last 20 years or so.  This year was no different – even though we couldn’t get down to North Carolina to join the family, we did have a visit with friends in Bethesda, and I made the soup.

Although I do follow the recipe closely, each year it is a little different – by the way, the link at the end of this post will take you to one that has the recipe.  Variations come from the type of winter squash used (I have used acorn squash, butternut, and banana squash – but there are plenty of others), the type of stock and amount of juice used (the last few editions have been vegetable stock, but I’ve used chicken stock before; also I’ve substituted wine or cider for the juice component of the recipe), or the type and amount of curry used (I always start with about a quarter of what’s specified and add more to taste).

Adding to the excitement this year, the kitchen tool that I use for dicing the onions broke while I was working on the batch, and then our old blender had broken as well.  Fortunately, we got a new Cuisinart food processor this year – that actually made the whole thing easier!  

I doubled the recipe for this year because the headcount for the meal was more than I had prepared for in the past.  We calculated that there was a gallon and a half of soup!  There are leftovers!

In any case, everyone seemed to enjoy it, and I did as well – so all’s good.   Here’s that link that includes the recipe:

Friday, May 16, 2014

Fish Loin d'Kevin

So, Mary caught me a little by surprise last Saturday night when she asked me if I might like to grill something. Honestly, I'm pretty much up for that most nights - the only challenge being what to grill, and should I go to the store to pick something out. 


Of course, here in Alexandria there is a freezer full of Kevin Bacon, the hog I butchered over the winter, to choose from as well, and we picked out the tenderloin for Saturday.  Mary had picked up some sweet corn and kale to pair it up with, so we had the makings of a nice spring dinner going.

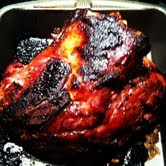
Pork tenderloin, sauteed in bourbon and gently
rubbed with smoked chipotle.
Now, David calls this cut "the fish" - I don't know why, but left to my own imagination I have come up with three potential etymologies:


-It's called the fish because it looks like one when it is first cut away from the carcass;
-It's called the fish because you have to fish around in the carcass to find it; or
-It's called the fish because it is tender enough and easy enough to separate out, simply by fishing it out with your fingers.
Actually, I owe that last one to Nathan Anda, chef at Red Apron Butcher, who Mary and I watched butcher half a hog once in downtown DC - he doesn't call it the fish though, he just demonstrated the technique.

In any case, as far as the approach to cooking Kevin's fish loin last Saturday, I decided I might saute it in some bourbon first.  This seems to lock in the natural juices so the tender meat doesn't dry out as much on the grill.  After that, I lightly rubbed it with smoked chipotle.

With more time to complete the cooking, I would normally use indirect heat to keep this cut tender and juicy, but instead I put the roast over direct charcoal for about seven minutes a side.  While it still had some pink inside, this was just a little past where I would typically like it, so I'll plan ahead next time so I can apply the preferred "low and slow" technique.

Tuesday, January 28, 2014

The Short Ribs


Ever since they were featured at the Page County Grown Farm-to-Table Dinner in 2012, I have wanted to learn how to cook short ribs.  They're just a tasty and satisfying cut of meat, very much a comfort food.  The challenge is cooking them low and slow to bring out the flavors.

I got a nice pack of short ribs from Skyline Premium Meats at the last farmers market in the fall.  With the weather staying in the frigid range this weekend, I decided to give them a try with our slow cooker in Alexandria.

After Googling a recipe, I braised the ribs.  Then I put them in the crook pot, cooking them on high for 7 hours.  Besides the local beef, I used a cup of home canned stewed tomatoes (I still can't remember who shared these with us, but they were delicious!), and two cups of Wisteria's Norton wine.  Any on-line recipe will list the other necessary ingredients.

They came out great - I plated them on some mashed potatoes and served brussel sprouts on the side.

Here's a link to that 2012 Farm-to-Table menu.  Just a reminder of great things to come next summer!
http://hawksbillcabin.blogspot.com/2012/08/farm-to-table-dinner-conclusion-of-2012.html


And hey, here are links to our two Page County Grown Farmers featured in this meal!
http://skylinepremiummeats.com/

http://wisteriavineyard.com/


Wednesday, November 27, 2013

The Green Chile Mac 'n' Cheese Recipe

Yeah - it's not very green.
One of my fond memories of church pot lucks and scout dinners is the banquet-style mac 'n' cheese.  For a long time I searched for a recipe, because I knew that someday in my adult life I would like to bring this dish along to an event.  At last I found a recipe in Grit magazine, a staple of leisure reading material at Hawksbill Cabin - this one is from the January/February 2010 edition.

The green chiles are fairly mild, but they have a great flavor.  If you want to punch up the heat, you can add minced jalapeno - I added about a teaspoon to my last batch for just a hint of extra flavor.

Ingredients:


  • 1 pound macaroni (elbow, bowtie, or shell)
  • 1 teaspoon olive oil
  • 3-4 cloves of garlic (minced or pressed)
  • Salt and Pepper to taste
  • 2 tablespoons unsalted butter
  • 1 cup chopped onion
  • 4 tablespoons unbleached flour
  • 4 cups whole milk
  • 1 teaspoon paprika
  • 2 cups grated cheese (I used cheddar, jack, swiss, and gruyere blends)
  • 4 to 6 green chiles, roasted, peeled, seeded and chopped (I used two small cans)


Cooking:

1. Heat oven to 350 degrees, butter 2 quart baking dish
2. Cook pasta al dente while preparing sauce.  Drain pasta and toss with olive oil and one clove of garlic. Lightly season with salt and pepper
3. In saucepan, melt butter over medium heat. Add onion and cook 4 to 5 minutes, stirring occasionally, until onion is translucent.  Add remaining garlic and cook one minute.  Add on cup of milk and stir well to blend.  Remove from heat (to prevent clumping) and mix in flour.  Add remaining milk, whisk to remove clumps.  Add paprika, salt and pepper.
4.  When sauce is hot, sprinkle in half the cheese and stir well until melted.  Taste for more salt and pepper.
5.  Toss green chiles with cooked macaroni.  Place half in bottom of prepared baking dish.  Spread half the sauce over macaroni, and add half the remaining cheese.  Repeat another layer, spread remaining sauce over macaroni and sprinkle remaining cheese.
6.  Cover with foil (use cooking spray on foil to prevent sticking) and bake for 40 minutes.

For presentation, I added bread crumbs, a little more paprika, and parley flakes to the top of the mac 'n' cheese before I put it in the oven.

Monday, March 4, 2013

The Pork Diaries: A Roast and A Quiche

We've got new pork.  It's time to get cooking.

When Chris and I did the hog this year, one of our decisions was to use a lot of the shoulder meat to make sausage.  As a result, there aren't many shoulder roasts - also called butt roasts - in the freezer.  But I had been wanted to try slow roasting one after marinading it in Goya's Mojo sauce - so I dug around and found a little blade roast to cook.

We let it marinade over night in the sauce, then I let it cook on the grill, offset over charcoal, at between 250 and 300 for a couple of hours.  That's a tasty sauce - I'm going to use it again.

I thought we might use some of the breakfast sausage over the weekend, but we were too busy to cook in the mornings.  So yesterday evening I used it in some quiches.

These are made with the farmhouse breakfast sausage from the butchering episode, so kale that I sauteed in the sausage fat and some beer, a mixture of jack and cheddar cheese, and a teaspoon of dehydrated onions in each.  I follow a Betty Crocker recipe for the quiche and we use frozen pie crusts.

The recipe calls for five eggs each - and guess what?  I had a new dozen from Public House Produce.  I put them to good use - we have quiche for days!

Wednesday, February 6, 2013

The Pork Diaries: Found a Half Rack

Here are the finished slow cooked ribs -
with kale on the side.
With butchering bearing down on me - we're set to work the new batch of hogs next weekend - Mary and I have panicked about how full the freezer is.  By surprise, I found a forgotten half rack of ribs in there over the weekend and I came up with a quick recipe to take care of them.

Since we’ve had snow flurries off and on for the whole weekend, I didn’t feel like getting out to fire up the big unit to smoke a half rack. Instead, I decided to try putting them in the crock pot – slow cooking them – and looked up a few random recipes on the web.

More or less, the recipes went as follows – remember, this is for a half rack! –
The ribs at the start of slow cooking in the crock pot.

Cut the ribs individually.  Rub them with your favorite spice mix.  In my case, I used the last of a mix a friend gave me for Christmas, adding a little brown sugar, cumin, paprika, powdered mustard and chili powder.  On a baking sheet, put them in a 400 degree oven for 15 minutes.

Here they are, just out of the oven, before
going in to the crock pot.  (I used Sam Adams
for the half cup of beer>)
Mix up a basting sauce of your favorite BBQ sauce and ½ cup of beer.  I added a tablespoon of honey to this, playing fast and loose.  Put the sauce in the slow cooker, and put the ribs in there too when they come out of the oven.  Make sure they are covered with sauce. 

Cook them on low until the meat is falling off of the bone, which could be up to six hours, turning them halfway through.  These ribs came from the pig Pork Chop and were quite large, so I expected to go the distance. 

As I am writing this, they’re looking good – and the whole house smells great.  I can’t wait to try them!

Tuesday, November 20, 2012

Green Chile Mac & Cheese

About ten years ago I went to Albuquerque on business for the first time. The advice I was given was to try and make it down to a diner style place on Route 66 and have a green chile cheeseburger.  I did it and the memory stuck with me - I think there are also still traces of that meal in my arteries.

So when it came time to choose something to make for the office pot luck this week, I remembered that there was a recipe for green chile mac and cheese in an issue of Grit magazine a couple of years ago, and that is what I decided to bring.  I've had some requests for the recipe, which was submitted by K.C. Compton, editor in chief of Grit at the time.

Ingredients

  • 1 pound macaroni (elbow, bowtie or shell)
  • 1 teaspoon olive oil
  • 3-4 cloves of minced or pressed garlic
  • salt and pepper to taste
  • 2 tablespoons unsalted butter
  • 1 cup chopped onion
  • 4 tablespoons unbleached flour
  • 4 cups whole milk
  • 1 teaspoon paprika
  • 2 cups grated cheese
  • 4 to 6 large green chiles - roasted, peeled, seeded, and chopped (I used canned)
Process
  1. Heat oven to 350 degrees, butter 2 quart baking dish and set aside.
  2. Cook pasta, drain, toss with olive oil and part of the garlic. Salt and pepper lightly.
  3. Simultaneously prepare the sauce.  Melt butter in a sauce pan, add onion and cook until onions are translucent.  Add flour and stir quickly, add garlic. Add 1 cup of milk, whisking to prevent lumps.  Add remaining milk and paprika, then additional salt and pepper if desired.  Jim note: I added 1/2 teaspoon of crushed red pepper here for a little bite, the recipes suggests jalapenos as a garnish instead.  When the sauce is hot sprinkle in half of the cheese and stir until it melts.
  4. Toss the macaroni with the green chiles.  Place half the macaroni in the dish and spoon over half the sauce, sprinkling with half of the remaining cheese. Make a second layer of mac and repeat.
  5. Cover with foil and bake for about 40 minutes.  You might use cooking spray on the foil cover to keep the cheese from sticking.
I glad I typed this up this morning - I sampled what I made - a double quantity - and see that I didn't use enough milk.  This would be extra creamy using the recipe above.  Also, I tend to go light on salt while cooking, so you might sample a few times along the way to be sure yours suits you.

Even with the mistake - I think that they'll eat all of it.


Thursday, June 21, 2012

About the Trout


Last year I came across this great cookbook by Barton Seaver - he's a DC chef, and the book is peppered with photos from around town.  In the book he hits so many good points for me - local, seasonal foods, great ingredients.

Thumbing through it, I found some highlights like the recipe for butternut squash with dates, red onion, and chives - that is in the autumn section, by the way.  I was already sold, but then I found so many seafood recipes that I knew we needed to have this one in the house.

Recently I bought some trout fillets at Whole Paychex, and when I needed a tip on how to grill it, this was the book I reached for to get some ideas.
What I found was the secret to great fish - brining it before cooking it, to minimize the moisture loss from heat.  I'm going to share the recipe for the brine here - and you can find it on page 249 for times for different kinds of fish (BTW, there is a handy Amazon link at the end of the post).


To make the brine, combine two cups of cold water, 1 tablespoon of kosher salt, and 1 tablespoon of sugar.  Stir until everything's dissolved, and then pour it over the fish - there's a photo of some trout in brine here.  After the designated time - trout should be left in the mixture for only 15 minutes, and this is done in the fridge - remove the fillet from the brine and pat dry with a paper towel.

Most fish take longer than trout, but none of Seaver's recipes recommend longer than 40 minutes.  And he warns that leaving fish in the brine too long is likely to ruin your dish.

I've grilled trout twice since I discovered this technique.  I am pretty happy with it - and I am looking forward to grilling other varieties now.

Amazon link to the cookbook:


Friday, December 30, 2011

Bourbon-soaked, Hickory-smoked

Well, here in Geezerville, the one thing we've learned is that practice makes perfect.  Nearly so, that is, if you believe the human condition is holding you back.  With that thought in mind I decided that I might try to do another smoked pork loin for Christmas dinner this year.

Using a 1.5 pound roast from Whole Foods, I considered a complex marinade to start with, but then thought that maybe going with something simple was a better plan.  So once I'd let the meat rise to room temperature, all I did to prepare this was to brush it with olive oil, and season it with salt, pepper and garlic.

Then to seal in the flavor, I seared it in a frying pan - I used as couple of ounces of bourbon here for that step in the process.  I'm not sure that I noticed a strong bourbon flavor later when we were eating...I used Maker's Mark, a blend, instead of a favorite like Elijah Craig or Snob Creek.

After the browning, I moved the loin to the grill, where the coals were already white and ready.  While the grill temp said 450+ degrees, I used an indirect method, hoping I had the loins in an area where the temp was more like 350 or so.  I let them roast unmolested for about 40 minutes, and used the meat thermometer to see how things were going at that point.

The only grill opening I did during this phase was to toss in some hickory chips, which I used this time instead of gathering up some sticks and twigs from around the Hawksbill Cabin property - we've got several hickories back in the wood lot, and I do hope to stockpile from them eventually.

Finally, the meat thermometer read 160, and I moved the loins over to the coal side.  I wanted to get some grill marks on them and bring them up to 165 to finish them.  Once they were done, we served them up with some asparagus, and a mix root vegetable side dish, both of which were prepared in foil packs on the grill.

Three photos below show various stages of cooking, and the finished product.  I'll definitely do this again, maybe doing the finishing touches at around 155 and taking the loin off the grill at 160 - they weren't overdone at 165, but the meat does continue to cook for a few minutes after they come off the grill.  So removing them from the heat a few minutes earlier isn't going to hurt anything.


Monday, December 19, 2011

Page County Grown: Stuffed "Festival" Acorn Squash

This year I picked up quite a few of the "Festival" acorn squash from Public House Produce.  It's a winter squash and when I buy it in October, it typically has been cured (David walked me through the process once, it involves a period of constant temperature once it comes off of the vine) and can keep through most of the winter.  We've had squash as late as February.

I tried a stuffed squash recipe last year, just a savory sausage version, which came from the Simply in Season cookbook, Amazon link below, and again - another tip from Public House Produce. I wasn't too thrilled with those results so this time I decided to try the apple and sausage stuffed squash.  I was probably a bit more careful with the cooking and preparation process this time too, and felt like I had good results:  Mary said, "This is good enough for company."

Basically, I baked the squash at 350 for about 45 minutes to soften the flesh.  I also sauteed the sausage, apples, onions (I added celery and carrots, although they weren't in the recipe) until they were soft, cooking them with the sausage after it was browned.  I also tossed in chopped walnuts and golden raisins, and a tablespoon of bread crumbs (the recipe actually called for bread cubes).

Once this was cooked, I stuffed it into the squash and baked at 375 for 20 minutes.  I should have covered the squash but forgot too - it was getting late.  In any case, we enjoyed this very much...I will continue to tweak the recipe as I have two squashes left.

Friday, November 18, 2011

Bon Appetit!

When Mom and Jeff visited a few weeks ago, besides the quick visit I made over to #OccupyDC, we visited the American History museum downtown. There were two big highlights for me there: the restored American flag exhibit, which I remember from grade school trips to the Smithsonian, but also the exhibit of Julia Child’s kitchen.


I’ve got a couple of photos of it here. Like many people my age, when I think of Julia, the first cultural reference that comes to mind is the classic Dan Ackroyd skit on Saturday Night Live, where he impersonates her and has a bloody accident with a kitchen knife. Then there is the movie from a few years back, Julia and Me, which offered a range of inspirational topics for a blogger and a person who just wants to learn how to cook better.

I do remember two of Julia’s PBS series from late in her career – there was the one with Jacques Pepin, where he practically orbited her in the kitchen preparing French cuisine, then another where she invited celebrities in to cook their own specialties. That’s the one I kept thinking of while I checked out the kitchen exhibit.

Getting to the point, I still have one of my “red birds” from the summer, courtesy of Public House Produce – I just took it out of the freezer in fact, and plan to do Julia Child’s Roast Chicken for dinner tomorrow. Here’s a link:

http://www.foodnetwork.com/recipes/emeril-live/roast-chicken-recipe/index.html

Saturday, November 6, 2010

Curried WInter Squash Soup


This week I made my first winter squash dish – readers may recall that I picked up a couple of squash from Public House Produce (link at the end of this post) on the Luray Farmers’ Market’s last day, early October. The squash I have on hand are in the second photo, the banana squash I used this time is the large one on the left.  I have several other dishes planned for future experiments.


My recipe originated with one I found in The Silver Palate Cookbook, I tinker with it some, but I’ve been making this soup for ten years or so based on this recipe. There is an Amazon link to the book at the end of the post also.

 
Three notes about the main experiments I did this time: I used banana squash instead of butternut, and I don’t put all the curry in at the same time. As far as types of squash go, besides the banana squash, which has a wonderful, papaya-esque color to it, I’ve also used acorn squash – of course, I have used butternut as the recipe calls for. To speed things up you can get pre-cooked butternut squash seasonally at Williams Sonoma.

 
I used a low sodium chicken stock this time. I considered vegetable stock, but I was short of time and the version they had at whole foods was fairly high in sodium, I thought. I have cooked the recipe both ways – chicken stock, or vegetable stock – many times. Also, I substituted a cup of white wine for the apple juice.

 
On the curry, since the spice has a strong taste, I recommend you add it later in the process, and incrementally, especially if you aren’t familiar with it. In the version I made this week I wanted a lighter flavor, but still with a little bite; I still probably only used about half the amount shown here in the recipe – I was using “hot madras” curry though.

 
That said, here is the recipe:

 
  • 4 tablespoons sweet butter 
  • 2 cups finely chopped yellow onions 
  • 4 to 5 teaspoons curry powder 
  • 2 medium-sized butternut squash (about 3 pounds) 
  • 2 apples, peeled, cored, and chopped 
  • 3 cups chicken stock 
  • 1 cup apple juice  
  • Salt and pepper to taste 
  • 1 shredded unpeeled Granny Smith apple for garnish

 1. Melt the butter, add the onions and curry. Cook covered on low heat until tender – 20 – 25 minutes.

 2. Peel the squash, remove seeds and strings, and chop. Be prepared, peeling winter squash is the hardest part of the recipe.

 3. When the onions are ready, pout in the stock, add the squash and apples, and bring to a boil. Then take down to lower heat and simmer until all is tender – should be less than 30 minutes.

 4. Strain the soup and reserve the liquid. Process the solids in a blender or food processor, using some of the liquid, until smooth.

 5. Combine the processed soup with the reserved liquid, to the desired thickness/consistency.

 6. Salt and pepper to taste and heat through. Serve immediately, garnished if you like.

 
This recipe make four to six portions. Mary and I often freeze the leftovers. Especially this time, with the banana squash – we have quite a bit leftover!

Public House Produce link:  http://publichouseproduce.com/

Tuesday, October 5, 2010

Squash Glamor

As I mentioned yesterday, this weekend was the last one for the Luray Page Farmers' Market.  Even though it's the end of season, there was still a wide variety of produce available, and we picked up a few items to enjoy in the next few weeks.

In addition to the vegetables shown in the photo, we got a small loaf of rosemary/sea salt bread baked by a local farm, and I got two small briskets, about 3 pounds each.  But today I want to post about the vegetables.

There are still tomatoes on the vines, even though there isn't enough sun to really finish them - Mary picked up a couple at the market even though she has about a dozen left in Alexandria.  There is also some lingering eggplant - we got two; I'm planning to pair those up with a couple of small sirloins I have in the freezer.  These steaks and the brisket are from Skyline Premium in Luray.

But on to the show stoppers - the squash.  The big one on the left is a banana squash...we'll have to see why it is named that.  But my plan for this big fellow is to make a batch of my version of curried squash soup - mixing the squash with apples.  This is a fall tradition for me - the family loves it too.  I think I have three pounds of squash in this one vegetable, which is about what the recipe (which is adapted from the Silver Palate cookbook) calls for.  Except for the butter I'll use, this recipe can be completed as a true vegetarian dish if I substitute vegetable stock for the usual chicken stock.

Then we have the smaller acorn squash.  I used to use the solid green version of this in the soup, but as I mentioned, I am going to branch out this year.  Both Mary and David suggested simply roasting these, which sounds great, I want to go a little further out on the limb.  I saw a couple of versions of stuffed squash in the Simply in Season cookbook - one used sausage, and the other mushroom. 

So that's my plan - one meat version, and one vegetarian version.  There have been a couple of suggestions for baking or roasting these, too, and we may end up doing that with one of them.

Lastly, the green kubota squash at the top of the photo.  David described how this vegetable goes through a succession of finishing steps so that it now can be kept for four to five months at a temperature of 55 degrees.  So I have some time to think about what to do with this one.  But based on David's description of how it's used, I'm leaning towards desserts...sharing it with Mary who could bake some loaves, or I will try to make truffles or squash bars...as a fall back, I know of a couple of nice curry side dishes I could put this one in.

Wherever this adventure ends up, that little Saturday trip leaves us with some entertaining ideas that we'll revisit with a couple of posts over the course of the fall.

Meanwhile, here are Amazon links to the two cookbooks I referenced above:


Friday, September 10, 2010

More on smokin' meat

As far as a follow-up post about my new smoker goes, I want to start out by saying thanks to my friend Chris, who actually did the bulk of the assembly of my new smoker. I would have gotten to this…but once he saw the job needed doing he was totally into it. Thanks bud!


One of the things about blogging is, you never know when a post is going to strike the chord and engage the readers to comment. I thought this might be the case with a post about bbq, like the one I put up yesterday about making brisket – and I was right. Once that post streamed over to Facebook, there was a nice dialog with comments and suggestions.

The first thing that came to mind as I started seeing the posts was a picture that I had in my head from Labor Day morning as Mary and I set out for breakfast. In the Kite Hollow area of Stanley, a fellow was sitting on the folded down tailgate of his F150, watching intently the barrel shaped smoker grill about 15 feet in front of him.

As we passed, I saw that he had just lit his coals, and was waiting for them to be ready – I guess this was about 9am. This whole thing is a bit like Thanksgiving in the end: the cooking is a big production, and in the end, however things turn out, the food is the centerpiece of a good time in the company of friends and family.

So now, let’s turn to some of the comments coming in.

From my friend Kelly, she mentioned an article about brisket that had appeared in the Washington Post recently. The dish wasn’t prepared as bbq, but the article is one of several that have come out recently about this cut of meat. Maybe it’s a change of season thing.

From Henry – the Labor Day ribs and chix photo that accompanies the post is his – he told me about how he likes using the trash can smoker he made. He sent a link, and this looks like an innovative, somewhat easy way to go if I take the next step with this and need a bigger set up. Actually a web search will yield a lot of interesting stuff about this cooking method, including tons of YouTube videos and other how-to’s…I have the spare mini-Weber I can adapt for this.

From Wes, there were some suggestions about technique and types of wood smoke to use:

“I recommend Mesquite wood for brisket, smoking it at 200-225 degrees about 1-1.5 hours per pound... low and slow will make the meat tender. Leave the fat on the top.. I cook it in a tin pan which will catch the drippings and keep the meat moist. I have used both marinades and dry rubs with good results. Try the BBQ Forum http://www.thebbqforum.com/  for some great info and recipes.”

When I told him that I wanted to emphasize hickory, since it is growing on the property, he replied, “Hickory is great for pork, chicken and turkey. When you do the pork loin, try mixing the hickory with the apple and oak if you can get it. Put a good pork rub on it the night before and smoke it to 160 degrees...it will dry out if you get it much hotter. You can usually get a bag of Mesquite chunks at Home Depot or Walmart for about $5.”

Then by email last night, a note from Bill in Tampa, who’s going to be in town next week. He wrote, “…saw your blog entry that you are doing some barbecuing; we'll have to discuss this and talk technique next week. I got a Big Green Egg several years ago and have enjoyed it very much. I have done several briskets, I always have liked the flavor but wish it was a little less dry. I have white oak, red oak, hickory, pecan, orange tree and Jack Daniels barrels to smoke with and they all have such great flavor. It is very cool that you have access to hickory and apple trees.”

I should mention that we also have white oak on the property, too.  I've got red oak in Alexandria - there are always branches and trunks coming down so it should be easy to come by.  So I have apple, hickory, and red and white oak to work with.  That makes a lot of opportunity to experiment with methods and flavors...Something to look forward to.

Thursday, September 9, 2010

Try the Brisket

After assembling and curing my smokin' new grill on Saturday, on Sunday I finally set out to bbq a brisket.  I'd picked up a small one a few weeks back from my friends at Skyline Premium Meats ( http://www.skylinepremiummeats.com/ ) (hey gang!)...at 2.5 pounds it is much smaller than what you might typically find for this cut, and it had been trimmed down to square as opposed to the typical tongue shape.

To prepare it, I rubbed it with olive oil, seasoned with fresh ground sea salt and black pepper, and then slathered on fresh garlic.  Then I let it sit on the counter to come up to room temperature while I went out to fire up the grill.

I built my fire in the box you see here to the left side, using match-light fuel to start things up.  After these coals were ready, I started dropping in hickory coals (the source of the very fragrant - and flavorful - blue smoke you see in the photo), which I did for the remainder of my cooking time.  I kept the heat in the main chamber between 250 and 300 degrees for the duration of cooking.

I had trouble with two things on this first attempt, but despite the challenges we both liked the brisket.  Maintaining the temperature consistently was difficult, so I'll keep working on that. 

I also used a meat thermometer to monitor doneness of the brisket.  It never showed read "medium rare" even, so I ended up over cooking by a bit.  Most of this brisket was in the medium well category, although the center thick areas were medium.  It definitely didn't need the 3.5 hours I gave it, maybe I'll cut back to 2.5 with a cut this size in the future.

The hickory smoke is the thing though.  I made some NY Strips a few weeks ago with these coals and they came out really fine.  The brisket picked up that distinguishing red layer around the edges, which we've come to recognize as a sign of the smoking technique.

And since we have three large hickories on the property, I'm hoping that I can learn to distinguish fallen branches well enough to save them for future cooking, like my neighbor Dan does.  I'll need to get some pointers from him.

I've also saved three foot long cuttings from some fallen apple branches, and I'll probably do a pork loin in the near future with apple smoke.

I've also dedicated a section of the garage to storage of my grills.  I only use charcoal out in the country - propane in Alexandria - but in three years I've accumulated three grills.

When it's just Mary and me, the mini Weber suffices - although I usually don't do smoked meats on that one.  For larger meals with lots of sides (in the height of summer, we have a lot of vegetables on the table) or where we're having the neighbors over, I'll use the Kingsford kettle.  And now, joining them, is the mini-smoker.

You know, we have to have our toys.  And this is something I"m definitely enjoying learning - I'll work on perfecting the technique and expanding the repertoire, posting periodically.

Friday, August 20, 2010

...anybody can grow zucchini, she says


So at last I have a zucchini I could harvest.  It's actually quite an accomplishment - as you can see here, it's on the cover of Mother Earth News, no less.

So as I am reporting this to my - friends - I get the comment that is this post's title.  Well there you go. 

Actually this squash got a little long in the tooth - so even though it was edible, it was so laden with seeds we decided not to use it in the recipe Mary selected, which came from the Moosewood cookbook, Amazon link below.

Also, this will be the only one we get from my container garden at the Hawksbill Cabin.  The hungry deer found the vegetable patch, and there are no leaves left on any of my vines.  The summer growing season is officially over.

Fortunately, we had some farmers' market squash leftover, and Mary decided to make a side dish for us:  "Stuffed Zucchini, Turkish Style."

The ingredients include the squash, minced onion, butter, crushed garlic, eggs, feta and swiss cheese, parley, dill, flour, salt and pepper and paprika.  The idea is to stuff the halves with the mixture (and the innards of the squash) after cooking it in the butter.  Then it is baked at 375 until the stuffing solidifies.

We paired this with tomato salad, because Moosewood recommends it and that's the other thing we have going right now - Mary's garden in Alexandria is under no threat of deer, and she is still getting tomatoes off of all the plants.

So, lessons learned:  you can do this container garden in a bag thing.  And it is an effective way to fight insects for the small timer.  But, if you are not going to be able to attend to the garden, and you are going to have to let it go native, like I did - you might be well served to protect it with a fence if you have deer.  And everything needed water this year, which is part of why not all my plants made it to bearing fruit.

I think we may try again next year.  But until then, we've always got the market.

Thursday, August 5, 2010

Vegetables in the Round

Knowing that it is high season at the farmers' markets, and with company coming, last weekend Mary and I set out to put on an al fresco dinner that was local to the max.  When I look at the phone cam photos, I realized there was a motif to all the vegetable shots, thus the name of this post. 

Starting with Thursday, when we had word that Kathy and Brendan would be joining us, along with neighbors Sally and Dan, we started menu planning.  We knew we could count on our friends at the Luray farmers' market for fresh vegetables and steaks - but I also wanted dessert, so I called Main Street Bakery for pies, and then, we picked up wine from Wisteria, as I mentioned in the post yesterday.  So with few exceptions, and I would be pretty hard pressed to identify what they were, everything we had for dinner was grown or produced within ten miles of Hawksbill Cabin!

We started with the fairy tale eggplant, from Public House Produce, which I grilled.  I shared this recipe a few weeks ago - the little fruits are cut in half lengthwise, brushed with olive oil and seasoned with sea salt and cracked black pepper.  Then they are grilled both sides.  This was our appetizer.

I also grilled sweet corn directly on the grate.  The corn was also from David and Heather's.  It was gently brushed with butter and had a light sprinkle of seasoning salt - sometimes I leave this off, but because we were grilling for new company we decided to go whole hog. 

The heirloom tomatoes in the opening shot for the post were cut up and mixed with some mozzarella that had marinated in oil and garlic.  We served that as a side to the main course.  Also, Sally and Dan had dug some new tomatoes out of their patch just that afternoon, so we had a savory side of roasted taters from them.

The last dinner item was a batch of New York strips from Skyline Premium Meats.  After I thawed them I gently brushed them with oil, and seasoned them with sea salt, cracked black pepper and garlic.  Once the vegetables were grilled I had to recharge the coals - I wanted to cook the meat over hickory, so I used some seasoned Kingsford charcoal for that.  Half of the steaks were "rarer" and half were "done-er."

The dinner wine was the Wisteria Norton I'd picked up earlier.  After dinner and before dessert, we moved on to the Wisteria steel barrel Chardonnay, and I supplemented that one with a second Chardonnay bottle from North Mountain, over in Mauertown.  The rain came during the conversation time, so we hustled to move everything in off of the brick terrace, and resettled in the dining room.

Then out came a pair of fabulous pies.  I am sorry I don't have photos of these masterpieces, but we had one peach and one cherry.  They were so good, and we were lucky enough to have leftovers to enjoy a few days later.

Now that I am at the end of the post, I remember the two exceptions in this local feast:  the mozzarella we served with the tomatoes was a Whole Foods purchase, and Brendan and Kathy brought a couple of specialty Belgian brews that we enjoyed while the coals were firing up.

There was so much to choose from at the market this weekend.  After we had gathered everything we needed for the dinner, we made a second pass to pick up a few items from other booths - we got some two-color zucchini, and a regular eggplant.  Also some peppers, and I thought about getting a bunch of chard from Sustainable Shenandoah this time, but didn't because I'd have to keep it a few days before we could use it.

All in all, we had a fresh local dinner Saturday night.  What's not to love? 

Sunday, July 11, 2010

Eggplant recipe #2

Here's another eggplant recipe from "Purple Lady" - thanks for sharing!  Mary and I are going to try this soonl.

I do a slightly different style, you may like. Chop the veggies, saute in sesame seed oil,add fresh basil and a little oregano,at the last minute. In a separate bowl, mix olive tamponade with Greek style yogurt. Then drizzle the veggies with the yogurt mixture.


Also, she tells me that the Sustainable Shenandoah group (I have a link to their blog in the left hand column) will have heirloom tomatoes coming in soon. 
 
Other recipes are welcome here.  I haven't been much of an eggplant fan in the past (I had a bad experience with eggplant parmesian in Paris in 1984 and kind of gave up on them), but this spring I was talking with Chuck at Main Street in Luray and watched him put together a dish - I got interested, so now we're eating eggplant. 
 
That's life baby, you know?

Thursday, July 8, 2010

A Farmers Market Dinner

By the time July comes around, there's a lot to offer at the Luray Farmers Market.  Here's a sampling of the take from last weekend - for vegetables, three kinds of eggplants, two kinds of squash, new potatoes; an apple pie; and not shown, a 2.5 brisket that I will learn to use my new smoker with.  We stopped by Main Street Bakery afterwards for the oatmeal loaf shown here.

We invited our friends Steve and Noelle over for dinner - we had some New York strips that I had been saving and we paired those up with the produce.  We were able to enjoy a North Mountain white and the Wisteria Norton - both local vineyards - for libations.  Here's what I did with the eggplant and squash...

Jim's Evolving Market Ratatouille
1 traditional eggplant (the big purple one); three petit pan squashes; half an onion, garlic, olive oil, a cup of white wine, a 15 ounce can of diced tomatoes (or fresh if they're in), Herbs de Provence, and salt and pepper)

Simmer the onion in a pot with enough olive oil to cover the bottom.  Peel the eggplant (Mary says you have to press it with kosher salt to get the bitterness out - I follow this step, you may not), then slice into quarter-inch slices.  Slice the squash as well.  Once the onions have softened up, add the garlic and tomatoes. Once they are warmed up and mixed together, add the squash, white wine, and herb de provence (this is a savory blend of spices, so go carefully with it, I add a bit at a time).  Also add the salt and pepper, not much, and to your own taste.  Then cook until the vegetables soften, but still hold their shape.  You may want to add a little sugar and more salt and pepper to bring up the flavor.  The whole shebang takes about 15 minutes in the pot, serve it as a side dish.  This recipe is giving about 6 servings.

Now, as I mentioned, I am continuing to develop this recipe, which I originally put together on a whim.  I think I would like more tomatoes in the next batch, since they will be coming in soon enough.  And if I do that, probably can taper off a little on the h de p.  But it's coming along - I've made this three times and so far no complaints...the first time I did it, I used Busta Browne's spicy catsup sauce, lightly brushed on the eggplant...that left us hankering for more tomato so I moved up the the current amount, but we're hankering for more, and I want fresh from the garden tomatoes in the next batch.

Now, as far as the little purple eggplants go, here's what Mary did with them last night - she sliced them in half, rubbed some olive oil on the exposed flesh, spinked sea salt and fresh ground pepper, and grilled face down.  They came out fantastic - you eat them right from the skin.  They are small enough you'll need a couple, the four we had made about two servings.  This is definitely something we'll try again - thanks to David and Heather for the suggestion.

We asked Chuck at Main Street what he would do with them.  He thought for a minute, and came up with an idea for baba ghanoush...grill the eggplant whole. When they are done, cut off the end and squeeze it like a tube of toothpaste right onto toasted foccacia...now that sounds like a fresh summer treat, doesn't it?

Speaking of Farmers Market Dinners - Luray's Mimslyn Inn is also giving it a try on alternating Friday's this summer.  Here's the poster - more details on their website.  Many of our friends from the market provide the ingredients...we're looking forward to having a chance to check it out soon. 

Tuesday, September 1, 2009

Loca-voracious


When we decided to get together for dinner with our neighbors Sally and Dan last weekend, I’d say the general sense of things is that we would have a nice time relaxing on the brick terrace, grilling some steaks and enjoying some of Dan’s home brew. Essentially, that’s what we did – rib-eyes from Mr. Burner and some produce from Public House (http://hawksbillcabin.blogspot.com/2009/07/i-ate-mr-burners-cow.html) and Dan’s latest IPA (http://hawksbillcabin.blogspot.com/2009/07/home-grown-hops.html ) - his best yet, by his own assessment, and I would have to agree with him.


Reflecting on our meal the next day, I realized that although some ingredients that went into the meal came from further away, all of the produce and even the steaks were produced within about ten miles of the Hawksbill Cabin. Don’t think of us simply as some silly yuppies succumbing to the latest trend in local organic cooking. In the valley, this was just something that happened; elsewhere, you might really have to make a fuss to accomplish it – and I am going to tell you all about it.


A fine meal it was:


· Cucumber-yogurt soup
· Organic tomatoes with balsamic vinegar and fresh basil
· Ratatouille of garden-grown squash, peppers, tomatoes and garlic
· Grilled sweet corn on the cob
· Beer-marinated rib-eye steaks
· Concord grape pie

We went to the farmers’ market in Luray for some of the produce we used, but a lot of it actually came from Sally and Dan’s garden. They have about a half acre that is organically cultivated for vegetables, and there is an old arbor of concord grapes that volunteers a good harvest most years. And then of course, as described in several past blog posts, Dan has nine vines producing Willamette, Centennial, and Cascade hops.

For beverages, we started with Dark and Stormys on the terrace while I grilled, moved on to sampling the new “Beaver Run Flat Tale IPA,” and finally had a couple of nice reds with dinner. Sally and Dan had found one of the reds the previous night, when they were out for a reggae concert at Clementine’s, and I had a spare bottle of “Big House Red” to supplement that one.

As part of the logistics, I had to break down for a larger kettle grill; I found this Kingsford grill at Food Lion on an end-of-season sale for $35. Not too shabby.

Of course, I have to end this post with a reference to our seasonal and organic cookbooks - Simply in Season and The New Moosewood Cookbook (Mollie Katzen's Classic Cooking)