Ramble On

Showing posts with label Home Brewing. Show all posts

Wednesday, April 13, 2016

Shakedown Batch 2 - The Coffee Porter

Since I wasn’t able to participate in the first pilot brew, I made plans to be there for the second.  The planned recipe was a coffee porter – the idea of combining cold-brewed coffee with porters and stouts is very popular these days, and I’ve found some good ones in the offering commercially from Sierra Nevada and Schlafly.  So it’s a natural conclusion to want to have one of these on the rotation eventually.

When I arrived, the team was working on the mash.
When I arrived, the team had already brought the hot liquor tank up to temperature and the grain was milled.  As before, in true shakedown style, there were some hitches in the process – true learning experiences that I see as an investment of time and effort to build skills.


The situations reminded me of my first terrified homebrewing experience when I graduated from one gallon batches to five gallon batches.  I’d made all of this investment in the equipment and the recipe kit – and when I went to do a check on fermentation about a teaspoon of my sanitation solution spilled in the beer.

Sanitation is the key to good beer, so it’s not unusual to have a solution around all the time while doing chores in the brewery.  I use a food grade product that offers the convenience of no rinse application, so after I checked the label to see if this small dilution would be okay in a five-gallon batch, I relaxed a little.

Eventually I called a friend about it though, and he reminded me that people have been brewing for 5,000 years, and sanitation hasn’t even been a science that long.  You can imagine brewers in the dark ages using malt that had been ransacked by rodents, animals crawling around in it, maybe feces dropping in there…so here I was worried that I might have a little sani-solution mixed in to my brew.
 
A side chore for the day was to move the Brown Barn Ale -
the "extra special bitter" - into a keg.
That conversation ended with the comment, “Relax, don't worry, and have a homebrew!” So flash forward a few years and here we are going through the steps of a shakedown on the pilot system – my sense of it was we should experience the whole thing and learn how to operate as a team.
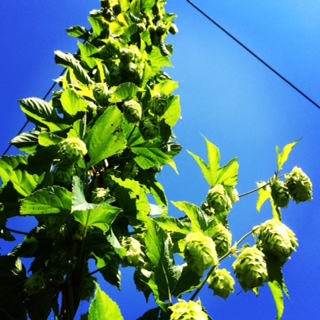
Since the cooler needed to be set for some hop yard supplies
(lower than fermentation temps) the coffee porter is going
to ferment in the garage.

So when I arrived, the guys were in the middle of figuring out some wort flow issues with the mash and the hoses and pumps – eventually diagnosed that the grain had been milled too finely.  The fix was to do a few of the steps manually, and during implementation that meant we got a longer protein rest at a lower temperature than the recipe called for…at the end of all of this we still had an O.G. that will yield a session alcohol by volume level.


Plus, it will be a coffee porter.  You know, the flavor of a beer like that is the key, not so much the ABV – so we’re looking forward to what’s likely to be a good thing!

Monday, April 11, 2016

The Shakedown Brew

The pilot system gleaming in the sun
of an early spring morning.
While the brewery is still in developmental stages and the licensing process is underway, we cannot brew beer and we certainly cannot sell it.  Meanwhile we still have some work to do on getting recipes together and perfecting all the steps needed to make beer, so we bought a pilot half-barrel brewing system and shopped it out to a local home brewer for all these shake down activities.
The malt for the first pilot brew.

After unboxing and assembling the system a few weeks ago, there was a lot of preparation for the first brew.  A brown ale was selected, and since it was brewed in a barn, the name for it was Brown Barn Ale. 


Local Fuggles and Cascade hops were used,
provided by one of the neighbors.
In true shakedown style, the grain was milled and then went into the mash tun.  The brewing process flowed from there – pumps and hoses and plate chillers and all.  At the end of it, the beer went into the fermenter at a good pitching temperature – just about 70 degrees. 


The fermentation process was carefully monitored over the course of about two weeks.  A northern English ale yeast was chosen for fermentation on this, but some recipe substitutions had to be made on the hops bill. 

Pitching the northern English ale yeast.
The product ends up just a little more bitter than what you might expect for a brown ale, so our brewing team promoted it – it’s now an extra special bitter. 


True to form in brewing, where you might find your taste tends more towards aroma hops than bitter hops, this will appeal to some but not all.  But it is still very drinkable and I’m sure that every drop will be consumed as the recipe development and equipment shakedown processes continue.


And the best part is it was our first one, made on the pilot system that eventually will become part of the brewery.

Tuesday, November 17, 2015

Brewing with @hawksbillhops

Since the hops harvest last August, I have worked on various experiments combining some of the hops varieties in a black IPA recipe I put together.  As an ode to “The Big Lebowski” I’ve tried naming the output on variations of “a black steer’s tuckus on a moonless night” – because the beer is quite dark. 

Some in the craft beer writing crowd actually call these beers over-hopped porters, which may be fair.  The current recipe I’m working with offers hints of toasted malt while leaving a reminder that it was brewed by a hops farmer – I’ve used 6 to 8 ounces of hops in each five-gallon batch so far.  The hops bill features either CTZ or Chinook bittering hops and Cascade for aroma; in addition, I dry-hopped the first two batches with either Cascades or some commercial Chinook pellets.

The batch in the photo here is still in primary as I’m posting this, but will be moved into secondary over the next few days.  It was done with the CTZ hops as bittering.  I don’t plan to dry hop this one.
On the ABV front, the two finished batches have gone at 7.2% (CTZ) and 6.8% (Chinook), I expect this batch to come in somewhere near those numbers as well.  The IBU calculations were around 60 for the CTZ batch and 45 for the Chinook, this most recent one will be closer to the original CTZ batch.

This kind of experimentation is a new stage of my homebrew experience.  I’ve had solid results with Porters, and the honey lavender kolsch was well received.  I could probably stand to try some lagering experiments and it goes without saying I should be looking into all-grain brewing, but I am not ready to make the time commitment for mastering those processes, especially while I am doing all of this in Mary’s kitchen!

To sum up the batches I’ve brewed to date with the Hawksbill Hops harvest, there are:
  • Batch 1: CTZ and Cascade, with a Cascade dry hop, delivering 7.2% and 60 IBU;
  • Batch 2: Chinook and Cascade, with a commercial Chinook pellet dry hop, delivering 6.8% and 45 IBU; and
  • Batch 3: Same recipe as batch 1 but no dry hop, and I substituted Maris Otter extract for part of the standard I'd used before; ABV/IBUs TBD .


There will be a batch four, it will be all Chinook, but I won’t brew that one until January.  I have in mind to make another go of a whisky barrel porter in the meantime; it will be bottled by the holidays but not ready for drinking until February 1.  My goal on that one would be to offer a near-stout experience that can be enjoyed in front of the fireplace. 

Monday, September 28, 2015

Brewing with Farm-Raised @hawksbillhops

On Saturday, I bottled the Harvest Black IPA - this is the second year I brewed it with hops I personally harvested, and the first time I brewed it with hops from Hawksbill Hop Yards, my farm in Luray, VA.  (I've written about it frequently, but if you want to see all the past posts, click here.)

Last year, the Harvest Black IPA was an all-Cascade affair (link), brewed with wet hops from my friend Bill.  I ended up making two batches of that one and they were well received, which is why I used the recipe again.  Bill recently told me that he has saved enough Cascade in the freezer that I can brew a couple of more batches.

In addition to Bill's Cascades, I have in mind to brew two versions of this beer from the 2015 Hawksbill Hop Yards harvest: first, a brew based on the combined flavors of CTZ and Cascade; and second, one that will feature a Chinook and Cascade combination.  To add some complexity to the first batch, I dry-hopped with two ounces of Cascade during secondary fermentation.

The recipe was derived from the Northern Brewer "Ace of Spades" extract kit, only now I order the ingredients separately and combine them in the necessary quantities for the beer.  In this case, I brewed on August 14th, and set the beer up to ferment with 1.068 O.G. - and ended up on September 25 with 1.014 F.G., for an ABV of 7.2%.

For the hops additions, here is the schedule I used on brew day:

  • 60 minutes - 1 oz. CTZ
  • 45 minutes - 1 oz. CTZ
  • 30 minutes - 1 oz. Cascade
  • 15 minutes - 1 oz. Cascade
  • 5 minutes - 2 oz. Cascade
  • Secondary dry hop - 2 oz. Cascade
You can surmise that I was after a decent IBU kick (the IBU calculator I used says 88 IBU, based on alphas of 13.23% and 6.65% on the CTZ and Cascade, respectively), but also wanted to be sure you got a punch in the face from Cascade aroma, thus the dry hop.  There is a lot of dark, sweet malt in this to balance those hops.  


I'm looking forward to seeing how this beer is after it bottle conditions for a couple of weeks...

Thursday, July 23, 2015

Getting Close @hawksbillhops


Here's a great big Cascade cone!
Since I knew that harvest is nearly upon us, I decided that I would stay back in Alexandria last weekend.  I took care of a few errands I have been trying to get to - and I brewed two batches of beer using some honey a work colleague gave me.  In the meantime, I missed my check-in at the hop yard, but fortunately David indulged me with a few snaps.

By the way, the two brews were a honey lavender kolsch - this will use the lavender tincture process I've discribed before (click on the label with this post to see how that was done), and a honey peppercorn saison.  The backyard honey I had was a very light amber, so I figured I'd use it in summery brews.  Later I'll get some buckwheat honey from our cover crop that I will use in a porter.

We've been tracking the Cascade, Chinook, and Columbus for the last few weeks, since those plants all did well enough in their first year to give us a harvest.  The Fuggles and Goldings all have cones as well, but the quantities aren't enough to consider them with the same intensity.  I will likely go out this weekend and hand pick the cones from those.

That situation isn't unexpected, and it's also nothing to worry about.  Especially with the Goldings, I figured the plants might need as much as three full years to mature to full yields - so we're going to patiently wait on them.

I suppose I have been obsessing about the harvest almost since we planted the rhizomes back in May - and my worries only increased once we started getting burrs on many of the plants.  At around July 4, I'd even picked a lupulin laden Columbus cone off of one of those bines.  I'm still not happy with myself about the harvest plan - we've never been through the cycle before and we definitely don't have a solid process, so I'm a little worried.
Here's a monster Chinook bine.

The other side of the argument is that it is the first year, so the yields are unpredictable anyhow.  The range of maturity times throughout the hop yard is varying widely within the varieties and between the varieties, which is typical of a first year crop, from what I hear.  So the decision we've made is to go ahead and harvest all at once, setting a date that is about a week later than what we're hearing from the guys down in Richmond and Charlottesville - we're one growing zone away from them, as confirmed by the arrival of Japanese beetles a week or two after they all got them.  

So that's our story for now.  We'll be working on the logistics for the harvest, and for oasting, as a next step.  The real fun is about to start!


Tuesday, March 10, 2015

"Relax, and Have a Home Brew" - Advice for Beginner Brewers


Three or four times now I've been asked by friends and acquaintances for advice about how to get started home brewing.  Now, I've only been doing this myself for four years, so I'm still very much a newbie - but I'm humbled by the requests, and glad to offer my insights to help get other enthusiasts started.  So today's post is a snippet of the advice I typically give on the topic.

My journey started with sitting sidesaddle with a couple of more experienced brewers - namely neighbor Dan and my friends Brendan and Stan.  After watching them, and helping them, with a batch each, I moved on to doing a series of one-gallon small batches, with the goal of progressing through all the steps on my own so I would know if I liked it well enough to progress to larger batches.

Here's a page with one gallon kits, as an example:

One Gallon Beer Kits

I ended up doing five one gallon batches (mostly from Brooklyn Brew Shop, which is represented on the page above along with others), so I really began to understand the process.  It underscored the importance of cleaning an sanitation, which should be drilled into everyone's head as often as possible when starting out.  Also, in reality, one gallon ends up taking the same amount of time as five gallons due to the accessory chores, which is another reason it's good to start small.

From there, I moved up to a five gallon set up.  I bought mine at a local home brew shop in Falls Church, Virginia, but there are tons of other resources for this, including two vendors I often use for ingredients:

http://www.northernbrewer.com (I tend to go to this one first)
http://www.midwestsupplies.com

Both of these have starter sets of all the equipment you need for a 5 gallon brew.

As a home brewer builds experience, there are two additional things he or she can look into: joining a local home brew club, and investing in some recipe books.  On the local home brew club, I'm a member of Blue Ridge Brewers Association, which meets in Luray (there's a link to the blog in my blog list on the right).  We meet three or four times a year to exchange information of interest to the brewers, to share recipes, and to do tastings of whatever new batches that our brewers bring along.

For recipe books, there are several I can recommend - with Amazon links below:


  • Anything by Charlie Papazian is a good read.  I quoted him in the title of this post - "Relax, and have a home brew." You can find older editions with plenty of references to the 1970's, which are a hoot, but here's a more recent one: 

The Complete Joy of Homebrewing Fourth Edition: Fully Revised and Updated


  • Also, there are tons of good recipe books, such as "Designing Great Beers" by Ray Daniels, or Dave Miller's "Homebrewing Guide."


  • Finally, if the hobby leads you to totally geek out, as it has for me, now that I am starting Hawksbill Hop Yards, you can dig into specific ingredients by checking out books like "For the Love of Hops" by Stan Hieronymus.  Obviously this is the direction I'm headed now...


I hope this info is useful to those getting started.  I'm happy to answer any additional questions via the comments to this post.  Happy Home Brewing!

Thursday, November 27, 2014

Another Great Brew Day at Beaver Run Brewery

It's been a two-year project for the Blue Ridge Brewers Association to develop a local source of malted barley for our home brewed ales - a project with legs, which if successful, could develop the source into a commercial product.

This year, working with a local farmer and a facility that could malt the grain down in Nelson County, a total of nearly 700 pounds was harvested and prepared for brewing.  Last week Dan drove down to Nelson County to pick it up, and he told me he was going to brew with it this weekend.  So I made plans to join him out in the brew-barn for part of the day.

As usual, I checked out the "on tap" board to know what I would be sampling during the work at hand.  Both offerings were great, but the Honey Brown Ale was unique in that it used some 25-year old honey Dan had in the basement.  The honey originated in Washington state, where his dad had a hive that foraged in a blackberry bramble.

They're calling the new malt 6-row Thoroughbred and I'll see if I can learn more about it in the future.  On brew day, Dan had planned a 10 gallon batch of IPA, and he had milled 20 pounds of malt for that effort, matched up with a selection of hops from the backyard hop yard.

I had an important errand to run during the middle of the brew, so I had my obligatory samples and helped stir the mash before checking out for a couple of hours.  Dan was using a step-mash approach to fully bring out the fermentables.  The effort involves a couple of pauses where the mash rests at temperature to ensure that its productivity is maximized.

When I got back to the brewery, the boil was just getting underway.  We walked through the hop additions - five of them, shown in order in the photo below.  All of the hops used in this brew were grown on the property - so between the well-supplied water, hops, and Luray-grown barley, this was a mostly local product.


I suppose the brew club will need to get to work on developing a local yeast strain now.  When they do, we'll have all of the major ingredients underway locally in Page County.

Our friends at Wisteria ferment one of their varieties with the yeast that comes in with the grapes from the field - so we know it's possible.  And I've heard rumors that at least one member is working on it.  In any case, there is a strain that has been isolated down in Richmond - we could brew with that one and have a Virginia-centric product, progressing gradually to our goal of a beer produced entirely from Page County ingredients!


Moving on to the true brew nerd portion of the post - Dan pulled samples of the wort as it progressed through the mash, all the way up until he started the boil.  We tasted each of them, from the sticky sweet, oatmeal flavored first pull through to the light amber of the final bit.

He measured gravity after the boil, before pitching the yeast, and it read 1.060.  Assuming the fermentation progresses normally, the target is 6.3% ABV.  Calculated IBU measurement is 64.

Ready in five weeks, I guess!

Wednesday, October 22, 2014

Sunday Brew Chores

Dryhopping the Honey Porter with
frozen Willamette hops.
It's atypical for me to have more than one batch of beer going at any given time, but these days I am in a hurry to use my fresh hops. I remain very worried about how they are stored - I didn't have time to oast them, so I simply froze them fresh.  They are very perishable, so I am worried about the impact to them from this unusual handling - there is a photo below.

I have fresh hops from a couple of sources this year - there is the harvest that Bill gave me, which consists of six batches' worth of Cascades, and there is the small amount of Willamettes that Mary picked from our backyard plant.  

I've been using the Cascades in a series of Black IPA brews, as I've posted in the "Brewing with Fresh Cascades" series.  My plan was to dryhop my latest batch of Honey Porter with the Willamettes.

Here's how the Willamettes looked
coming out of the freezer.  I had to use
them quickly!


The two batches going on right now are a Honey Porter, which is one of my go-to brews, and the Black Widow IPA, which is the recipe I have been using with the frozen Cascades hops.  On Sunday, the Honey Porter had been in primary for just about two weeks, and the Black Widow had been in primary for a week.  My chore was to move them both into secondary.

It's not a difficult process - but process is the key word here.  There is a ton of sanitizing that has to be done, and then careful siphoning between carboys.  A key step is taking a sample to measure fermentation progress - this is done with a thermometer and hydrometer - and record-keeping.

For the Honey Porter batch, since fermentation had progressed pretty far already, I will probably only leave it in secondary for a few days.  The Black Widow will stay in for about two weeks before I bottle it, which is the next step, in fact, washing and sanitizing bottles is another one of the chores I'll be doing today.

The brew record for the current batch
of Black Widow IPA - sitting at about
7.10% ABV on 10/18.
This is the record for the Honey Porter
batch - it's at 5.78% ABV.
Closing the post, here are photos of my records for the two batches, showing both the brew cycle and progress through Sunday.  At bottling time, a final measurement of gravity and temperature takes place, and the I calculate the estimated alcohol by volume, or ABV, for each batch.


Wednesday, October 15, 2014

One for the Berliners - Brewing Memories

While I was busy brewing on Sunday, Mary took Tessie out for a walk.  As it happened, that was during the boil – when the wort begins to give off those wonderful smells mixed in with the steam evaporating from the kettle.  My brewing enterprise is still small scale enough that I can do it in the kitchen, and when I do, I turn on the vent fan over the stove.

Mary came back from the walk and told me that the neighborhood smelled like a brewery.  That was delightful to hear…and of course, it brought back a fond memory of my USAF time at Tempelhof Airport in Berlin – there had been a small Schultheiss brewery nearby, and in the morning we frequently would be greeted by the smell of boiling wort.

Google Earth map of Tempelhof Airport environs, in Berlin, Germany

After a little bit of sleuthing, I came up with additional information from the Google about the little brewery…I was surprised by this first link (note, it is a link to a preview page of the book “Last Flight from Tempelhof” – written by an Air Force friend), coming up as result number 3, which mentions the smell of the nearby brewery.

Here's a photo from Google Earth of the old brewery.
As I navigated the area on Google Earth, I found a few photos of the old brewery.  I remember when I first discovered it when I lived there – on spring mornings I would walk back to Tempelhof from the Mehringdam U-bahn station through the Kruezberg park, and I found the old brewery back there along the cobblestone sidewalk. 

Another Google Earth photo, showing the operations and
trades shops for the brewery.


According to this Wikipedia article, the brewery ceased operations in 1994.  Schultheiss now has a larger modern facility in what used to be East Berlin, actually to the northeast of the old site and Tempelhof field.     


From Google Earth "streetview," here is a photo
of the old Schultheiss malt factory.
Another link I found outlined a walking tour of the Tempelhof District.  That one mentions an old malting factory that was west of the airfield, and south of the brewery.  The presence of this facility was news to me, and I am glad that there was a street view photo of it!

Thus, another connection to brewing is discovered, I guess!

Tuesday, October 14, 2014

Brewing with Fresh Cascades - Chapter 2

When brewing with "leaf" hops I use poly muslin bags to minimize the
need to filter stray flowers in later stages of brewing.
They say home brewers are creative, and I guess that’s why I consider each batch of beer that I brew with the Cascade hops Bill grew in his backyard an experiment.  The theory is only confirmed by a conversation I had with Dan recently after he told me he planned to use some honey that his dad collected in Alaska and stored years ago in a brown ale.  That batch will be all grain – pretty advanced stuff – in addition to crafty…I’m looking forward to a sample.


Meanwhile, my investigations are moving in parallel, focused on perfecting a couple of different brews so that I can experiment with different hops to see what I get.  So far, I’m on my third batch of Black IPA – which I’ve named the Black Widow series:  

  1. Black Widow IPA #1 – this was brewed according to the Northern Brewer recipe, including Magnum, Chinook, and Centennial hops, then dry hopped with some of Bills Cascade from last year’s crop;
  2.  Black Widow IPA #2 – this was the first batch I brewed with the fresh hops we picked at Bill’s place in August (check out the links at the end of this post), which is dry hopped in secondary with packaged Cascades; and
  3. Here's the first pour of Black Widow IPA #2.
  4. Black Widow IPA #3 – this batch was a weekend project just brewed on Sunday, and currently in primary – the recipe is the same but the difference between batch 2 and batch 3 will be the storage time I had the fresh hops frozen, as I used the hops in batch 2 within three weeks of picking them and in batch 3 about two months afterwards.


Batch 2 has been in conditioned the bottle long enough that I tasted it over the weekend. These batches are fresh hop brews, which reminds me of the efforts by the Old Dominion Hops Co-op to establish a hops industry in Virginia.  Those guys recommend starting small, and since the harvest doesn’t yet have the scale to merit some post-harvest processing, the focus is on selling the fresh hops to local brewers who will use them right away in a seasonal brew.

These are the spent hops from Black Widow IPA #3.
Here’s a quote from an article earlier this year in the Richmond Times-Dispatch:

"While brewers want to be supportive of the local product, quality and price are business considerations. Hops straight from the bines, or “wet hops,” must be used quickly — a good thing in capturing flavor and aroma for special brews. But for year-round beers, pellet hops purchased in bulk with analysis of acids and oils go a long way toward ensuring consistency and control costs."


I guess the Black Widow series is my own small-scale experiment with the concept. 


Here are links to those earlier posts about Bill’s hops.

Friday, August 22, 2014

Brewing with Fresh Cascades

The second 2 oz. hop application, top, and
the 1 oz. aroma batch.
A few weeks back I wrote about our afternoon of picking the hops neighbor Bill had grown in his backyard.  (The post is here if you'd like to check it out:  http://hawksbillcabin.blogspot.com/2014/08/sunday-hops-picking-in-luray.html).  Last Friday I broke some of them out to brew an IPA with.

I've adapted the recipe from a Black IPA kit I got (I have one batch that was completed faithfully to the kit recipe just going into bottles - with the exception that I dry hopped it with some of Bill's last year crop).  In this case, I used a 5-to-1 substitution ratio of the fresh hops to the dry hops the recipe called for - I used Dan's ratios to calculate the rate for that, since he told me that drying them reduces them to around 20 percent.

The aroma hops went in at the end of the boil.
I went with two bittering dosages of 2 oz. each, one at the start of the 60-minute boil and the second at 30-minutes.  Plus I put in a final 1 oz. for arome at five minutes before the end of the boil.  I plan to dry hop with a package of Cascade pellets, since that doesn't increase IBUs and this will probably be on solid ground in that department.

The beer will be in primary for another week, then I will transfer it to secondary for two weeks.  I'll also let it bottle condition for two weeks before drinking it.

Tuesday, March 25, 2014

Brew Day at Beaver Run Brewery

We had plenty of errands to run at Hawksbill Cabin over the weekend, but ended up with a few postponements on our Saturday appointments - so I walked on up to visit Dan at Beaver Run Brewery to see if I could help out on brew day.

I'd seen a post on Facebook earlier that day that he had planned a 10-gallon batch of the Flat Tail IPA (Brian:  beavers have flat tails, and the brewery is near Beaver Run, hence the name). He had some new equipment and techniques to try out, and I was interested in seeing how those worked as well.

Dan's evolution in brewing technique graduated to all grain two or three years ago, when he added large kettles that suit this style. He added propane "outdoor" style burners, along with a pump and wort chiller to complete the set up.  He doesn't have to lift any hot kettles, and temperature sensors are built in.

It's a pretty high quality operation that produces consistent results, so he has also been experimenting with beer styles, producing a pilsener and stout recently. His standby has always been the IPA though - so this was a good batch to be around for.

The major upgrade of the day was the new yeast starter outfit.  It's shown here in the photo - I've lost track of how long this yeast had been "awake."  The plan was to split it into two five gallon carboys, after starting from one commercial vial.  Later he'll harvest a little and start keeping his own starters in the brewery fridge.

While I did help out during the boil, my role for the day was to act as brewer's assistant.  I took care of some of the intermediary cleaning and sanitation after the mash and sparge were completed.

As always, one of the main features of Beaver Run brews are the home grown hops - there's a photo here of Dan adding the bittering hops early during the boil.  Later on I took a walk over for a look at the idle hopyard.  It won't be long until we start seeing little shoots come up on the bines.

For myself, I really am impatient for winter to end this year.  So I'm looking forward to seeing some green in those little hills in the backyard.


Tuesday, March 18, 2014

Brewer's Chores

For this snow day, I decided to kick back and take paid time off - used the time to take care of some brewing chores that had been waiting.

First thing, I bottled my Cascade IPA on Friday, taking notes on the gravity readings.  Since I lost a lot of data when my old computer crashed recently, I needed to find a new alcohol by volume (ABV) calculator, and I did, using it to calculate the results of the Cascade IPA.  By the way, since that is conditioning in the bottle right now and I'm estimating that it will be ready on April 15, I am calling it "Tax Day IPA."

The temperature corrected original gravity on this one was 1.051.  It finished up at a final gravity of 1.013 - so I'm giving it a 4.99% ABV.  That is paired up with an international bitterness unit (IBU) measurement of 55.3, all from Cascade hops, including 3 ounces of Luray local hops from fellow grower Bill.

My second errand was to strain off the bitter orange/coriander tincture I've been making for "La Petite Orange" - the Belgian Dubbel I posted about last week.  That orange peel is difficult to work with - it absorbed a lot of the vodker and I could not extract it.  I'll go with what I was able to strain off - maybe two ounces - and I'll just add that at bottling time.

My third and last chore was to move La Petite Orange to secondary.  It's been percolating downstairs since last weekend, but primary fermentation has finally ended.  Two weeks or so in secondary, and I'll bottle it with the tincture mixed in.

Wednesday, March 12, 2014

Brewing La Petite Orange

After steeping the specialty grains.
This is a recipe kit I bought last year: it's a Belgian Dubbel style, and I decided to postpone brewing it because it wouldn't be ready until the summer.  With March already here, it seemed that I'd best go ahead and brew it now for a May release, before the full heat of summer is upon us.  Here's the beer's description from the recipe kit:

Back by popular demand! A Belgian Dubbel without the deep dark chocolate maltiness, the Orange is rich with caramel sweetness and a full body that hides the 6.1% ABV very well.  Lueven ale yeast contributes rich esters - cherry, strawberry, lychee fruit, even hints of tropical breezes.  A simple sipper that evokes warm summery memories with every sip, yet fits perfectly into the colder months; standard brewing repertoire.

By now I know my way around the brew kitchen well enough to take some liberties, so I went off recipe for some elements of this one.  First of all, I used a dry ale yeast instead of the Lueven ale yeast suggested - I don't even remember receiving that one in the kit, to be honest.  Goodbye, lychee fruit esters!
Making the coriander/bitter orange tincture.

I also decided to use some bitter orange peel and coriander in the recipe, which suggests this addition at the end of the boil.  That was part one of the approach...also from the recipe:

Brewer's note:  You may wish to add up to 1/2 ounce crushed coriander and the zest of two oranges at flameout for a "La Petite Orange Blanche."

I took this suggestion a step further - I added the "blanche" ingredients, as suggested.  I decided I wanted these flavors to be a little stronger, though, so I also started a tincture with half the ingredients.  I had success with this method before - a Honey Lavender Kolsch from last spring, just check the "Lavender Tincture" label at the end of the post.

Coriander and orange peels floating around.
I'll let those ingredients steep a week or so, then strain them off in the hopes of not being too strong when I add them back at bottling time.

After I finished the boil and gave the beer its ice bath, I moved it into the carboy.  I've upgraded my approach, so I took a hydrometer reading after that.  O.G. is 1.052 at 70 degrees - right on target for the recipe, so fingers crossed this comes out at 6.1%.

I'm planning one week in primary, then two weeks in secondary.  I'll also strain the tincture after the first week, and keep it refrigerated until I am ready to bottle.

Speaking of bottling, I'll be putting up the Cascade IPA soon.  And next on the brew calendar is a repeat of the honey lavender kolsch!

Tuesday, February 4, 2014

The Cascade American Ale

Last fall I bought a one gallon kit from Northern Brewer called Chinook IPA - it was a single-hop brew that came out pretty tasty.  The only problems were that it was a one gallon batch, so there wasn't much of it; also the Northern Brewer solution for carbonation in small batch is "fizz tabs" - capsules of corn sugar solution you apply directly to the bottle - this didn't yield a consistent result for me.

Still, the tasty beer made me want to experiment some more, especially with this single hop approach. I had some locally grown Cascade hops from my Luray neighbor Bill that I wanted to use, so I made a plan to adapt the extract recipe from "Chinook IPA" to "Cascade American Ale."  I brewed that on Sunday before the Super Bowl.

This particular batch is also the first time I used the BeerSmith software, which neighbor Dan had recommended.  I put my ingredient list in the software and it did some basic calculations for me, including expected ABV, and more importantly for an ale, the IBUs.

After inventorying the leaf Cascade, I found I had 3 ounces of the local ones - when I did the IBU calculation, the result was less than you want for this variety of beer.  I found two packs of Hop Union northwestern Cascade pellets, so I added those.  I got the IBU up to 55, where the threshold for ale styles is 50.

The expected ABV is around 5.4%, we'll see what we get when I bottle in about three weeks.  Meanwhile, the O.G., shown being measured in the second photo, was 1.050 at 74 degrees.


Tuesday, January 21, 2014

Dan's Double IPA


Here's the mash tun during the early stages.
We decided to take a three-day weekend out at Hawksbill Cabin.  There was an agenda, as we'd be meeting friends in Culpeper for dinner one of the days - and I needed to check on the pigs.  Then Dan told me he was planning to brew on Saturday, and that he'd be using a new recipe that involved 20 pounds of malt - a double IPA - so I decided I would make a stop over at Beaver Run Brewery and help out where I could.

Dan's been using the Beer Smith app to compile recipes - he has been brewing for years and the Flat Tale Ale recipe is pretty set.  Largely as a result of the brewers association, he has been adding a few ingredients to the mash, including rye, and using a step-mash technique to get as much out of the malt as possible.  This time, he was going for a double, and he queued up the app to list all the ingredients (I have a snap of that part of the recipe below).
Here's a portion of the recipe - hash marks are mine.

The step mash process is very effective, but there is a lot of extra time and detailed record-keeping involved.  It seems like, especially when you are brewing with this kind of quantity, you really do need a second set of hands in the brewery to help out with every thing.

We were checking mash temps and stirring the mash at intervals as everything progressed - it really was a demanding pace.  I know it will pay off with a high-quality brew though!

Since we are getting close to butcherin' season, I decided to save the spent grains for a trip to visit the hogs.  I'll post on that visit over to Public House Produce tomorrow.


Tuesday, January 14, 2014

The Home Brewery is Getting Out of Hand

My brew kitchen in the laundry room.  Such as it is.
Mary's been very tolerant of this brewing adventure.  She doesn't mind when I disappear for half a day when I go visit Dan's brew kitchen up the hill from Hawksbill Cabin.  She's gone so far as to buy me recipe books, or order gifts right from the Northern Brewer website.  And she doesn't mind that I have taken over half of the laundry room with equipment and supplies.

I should note that the beer shown in the photo is not all my product - only about half of what is on the counter there is beer, the rest are cleaned empties waiting for refills.  About half of the remainder is home brew, with the others there gifts from friends or neighbors or my own stash (I have hoarded a four-pack of Sierra's Hoptimum, for example).  There are also four cases of home brew bottle conditioning there on the floor below (along with four cases of new bottles).

For the first time since I started this hobby two years ago I have a brew calendar that stretches out to May - mostly still brewing extract kits, although I have begun piecing together my own recipes.  Here's what I have planned through May:


  • Super Saison - this is the Northern Brewer Saison de Noel, however, I am late for a holiday release and instead plan to release this in time for Super Bowl.
  • Honey Porter #4 - my fourth attempt at Honey Porter, this is the one I posted about yesterday.
  • Nut Brown Ale - I have been waiting for winter to brew this one, and it is next on my list.
  • Cascade IPA - I plan to brew a single-hopped IPA using Cascade hops.  Three ounces came from fellow brewer Bill out in Luray, grown in his backyard.  I'll dry-hop with an ounce of Willamette Cascade hops that Dan gave me.
  • Petit Honey Saison - Another variation on a Northern Brewer kit.
  • Honey Lavender Kolsch - I made this with the lavender tincture last year and it was very popular.  I'll brew it for an early May release this year.
  • Couer de Saison - this promises to be a light saison for June release.  It's a flyer for sure, as the kit includes the makings of a basic saison with grape juice added, to lighten it up and make it a beer-wine combo.  Skeptics get in line behind me.
Since this is getting out of hand, maybe it is time to think about moving on to all grain brewing.  That means I'll need to do most of the work outside on brew days, which is okay, but it also means I'll need more room, like the entire laundry room.  Mary and I talked about it, she wants a remodel.

Accompanying that move to all grain brewing will be an aggressive move to making my own recipes.  To help with that transition, I asked Mary to get me a book called Designing Great Beers (Amazon link below), to assist in the analysis and estimation of how ingredients will work together.  After the spring and summer brew calendar above is under my belt, I'll be ready for this next step.


Monday, January 13, 2014

The Second Porter

Here's a past batch of porter.
Nice traditional American dark beer!
Last month I wrote a post called “Two Porters” – I had bottled a version of honey porter and just brewed a second.  On Saturday, I bottled that second one, just in time as it turns out, because I have given away all of the other.  The brew cellar is still full, however; the batch of “Super Saison” is down there bottle conditioning as well.

In that post (dated 12/16/2013 if you’re interested in looking back for it) I mentioned that the second honey porter is actually an adjustment to a Pumpkin Spice Porter kit that I had bought in the fall and never brewed according to the recipe.  

Here’s a description:

This seasonal release autumn ale is the perfect companion to the changing season – from harvest to the holidays!  The recipe starts with Briess CBW Porter base extract partnered with caramel 90L, Carabrown and dark chocolate steeping grains.  To spice things up we added cinnamon, allspice and a hin of ginger.  The selected hop additions provide a mild balance in bitterness and this ale is fermented with Safale S-04 premium yeast.

Of course, I substituted Virginia Shenandoah Valley honey for the spice pack, following all the other directions in this kit.  The hops here are Northern Brewer and Willamette – these should combine for a mild hop flavor, although I read that the Northern Brewer may portend notes of black currant.  Oh, look at me ramblin’ again.


The recipe said this starts at approximately 1.060 O.G., and I read it as 1.019 when I bottled it Saturday.  That yields to 5.5% ABV, which is about where I like to see my beers come out.  So two weeks in the bottle and we’ll be ready to roll with this one!

Tuesday, January 7, 2014

The Seasonal "Super Saison"

Last year's batch.
Last year I brewed the Saison de Noel as my second or third batch of homebrew.  It’s an extract kit from Northern Brewer, designed to be a little stronger than some more typical Saisons, as described below:

Deceptively dark and beguilingly complex, this holiday specialty is brewed in the tradition of Belgian farmhouse ales.  Unlike most Saisons, intended to refresh and sustain farmers doing manual labor, this one is engineered to complement rich holiday fare and sustain you through long winter nights.  A generous malt bill with highlights of butter toffee, chocolate, dark fruit, and bread tangles with the earthy, spicy funk of Wyeast’s French Saison strain and a single addition of bittering hops to strike an evolving balance.

Now, it was an oversight on my part, but I used Safale S-04 instead of the Wyeast…I discovered my mistake after I transferred the beer into secondary and was recording the gravity reading.  I don't expect any poor effects, but it may have impacted how much fermentation occurred.  By the way:
  • O.G.:  1.070, 70 degrees
  • Interim:  1.020, 70 degrees
  • F.G.:  1.018, 68 degrees

I calculate approximately 7.1% ABV from this.

I bottled on Saturday, January 4, and plan to release this on January 24 – in time for the Super Bowl. 


And for that reason (not to mention the yeast oversight), I am calling it “Super Saison.”

Monday, December 16, 2013

Two Porters


Didn't make it out to Hawksbill Cabin this weekend, so I took care of a few errands instead.  One of the errands was to brew another batch of Porter - I have one of the honey porter batches in bottles now, and now I have one in primary fermentation.  I even sprung for some label paper and did a little extra with the first batch.


This second batch ends up being something of an experiment.  It's a kit from Brewer's Best, as opposed to the Northern Brewer kits I have been using.  The new kit was originally for a pumpkin porter batch, but the fall got away from me before I could brew it, and so I substituted honey for the little spice pack that was provided.

I contributed three bottles of the old batch to an auction for Wounded Warriors at the office - our group raised $2,800 in this event.  It was really nice to have an opportunity to be part of that.

In a couple of weeks, I'll have a few bottles of both batches that I can break out and taste test against each other.  This will mainly be about comparing the hops styles, since they had different bittering and aroma varieties added.  Also, the first batch includes Minnesota clover honey, while the second is a mountain wildflower variety from the Shenandoah Valley - if I'd had enough at the time, both would have used a local product.

So the brewing adventure continues.