Ramble On

Showing posts with label Tech-Watch Geek. Show all posts

Monday, December 30, 2013

Stoneyman Summit, with Ulterior Motives

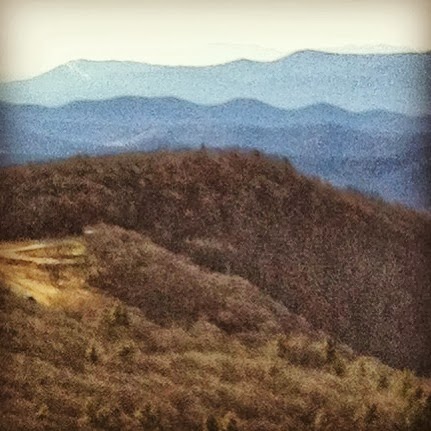
At the Stonyman summit.  Luray is just behind Mary
and me, and Lake Arrowhead is center right. The furthest
ridge is Great North Mountain, in WV.
It's probably just coincidence, but since we have been coming to Hawksbill Cabin, Mary and I have taken a couple of hikes in Shenandoah National Park on the last weekend in December or the first in January.  We continued that tradition with a short hike to the Stonyman summit last Saturday.

It was a great day for a hike, with clear, bright skies and warm temperatures, so the time was right.  But as the title of this post suggests, I had a couple of other ideas about the hike - for one thing, I wanted to try out my new Casio Pathfinder watch.  The other motive will be the topic of my next post.

The Stonyman hike is short, only 1.5 miles, and the elevation change is about 330 feet.  It qualifies as an easy one in my book - but it does end with one of the best views of Luray and the Page Valley that you will find in the Park.  Stoneyman is the second highest peak in the Park, by the way, at 4,010 feet - and on a clear day like Saturday you can see all the way to West Virginia.

The white blaze marks the route of the Appalachian Trail,
while blue blazes mark other routes throughout SNP.
Despite its shortness, this is one of my favorite hikes in the park.  It is close to the Skyland resort, so it was designed as an interpretive trail - there's a guide and marked stops to curate the walk in the woods - and there is a horse trail near the summit that marks a second vista that is often less crowded than the main observation point.

When I first found the trail, one of fondest discoveries was the twin blazes that mark the route: white for the Appalachian Trail, and blue for other hikes in the Park.  There used to be a sign where the routes diverged, about halfway up; I think that it said that point was the highest spot on the AT within the Park boundaries.  I need to go back and look through some past posts to remind myself, I know I have posted a photo of that old sign.

View to the Southwest, across Skyland Resort.
The peak in the upper left is where Massanutten Ski
Resort is, and you can just see the trails.
Using the new Pathfinder, Mary indulged me while I took measurements at three spots on the trail:  at the trailhead, at the point where the AT splits away, and at the summit.  Some features have changed since I had my last watch, but from experience I knew to take a reference altitude from a marked location, in this case the summit, at 4,010 feet, to calculate the climb.  I calculated a net gain of 326 feet, and for now that will be the high point record with the watch.

While we were at the summit I told Mary about the first time I took this hike, back in the days when I was checking off all the "Easy Day Hikes" routes (obligatory Amazon link below).  I got the horse trail summit and sat down to enjoy the view when my cell phone rang.  I spent 30 minutes on a work conference call up there that day, even though I was on vacation - you can bet I billed for that call!

The trail wasn't crowded, but we weren't the only ones who had the idea to go out on a hike. We enjoyed meeting a young family, a mother and daughter out on a walk, and then a couple from New Jersey (Red Bank - exit 109).  But as I mentioned, there was one other purpose for getting out on this hike, and I will post about that next.


By the way, here's the link to the Best Easy Day Hikes book I mentioned above:
Best Easy Day Hikes Shenandoah National Park, 4th (Best Easy Day Hikes Series)
It's not my only guide to the park, but I do refer to it frequently.


Friday, December 27, 2013

Tech-watch Geek, Jr.

Back in April 2013, my beloved Casio Pathfinder watch died.  I wrote about it in this post:  http://hawksbillcabin.blogspot.com/2013/04/tech-watch-geek-my-casio-pathfinder.html

That post highlights the lowest and highest altitude recordings I’d made on the watch:
The highest altimeter reading was in Yosemite in 2010: 2,315 meters, or 7,200 feet, without adjusting for barometric pressure.  The lowest reading was (negative) 150 meters, taken in Death Valley in 2011.  Again, with no adjustment for barometric pressure, that translates to (negative) 465 feet.

On a whim, I asked Santa to bring me a new one this year, and he did.  The new watch is another in the 240 series, similar to the one pictured in the Amazon ad in the right column – very much like the old one – only this one has some upgrades, including “”Tough Solar” (I always suspected that the battery dying had something to do with the old one breaking down on me), and a better water resistance (to 10 bars – not just hand washing, filling water bottles in a stream, or righting your ditched canoe).

Now, I got my first Casio Pathfinder from Santa as well, back in 2009.  I did some analysis of a number of what I call “tech-watches” – watches that included features like altimeters, barometers, thermometers, stopwatches, and alarms – including the Casio, Suunto, Timex, and Tissot offerings.  I’ve been a fan of Casio watches for the ease of use for a long time, so I settled on it for that reason – and also because of this Amazon review of the Pathfinder by Bart Barnack:

"My first [Casio Pathfinder] lasted through 3 assignments in Iraq and one in Afghanistan. Half the team wore this watch and the other half the Suunto Vector. Most of us owned both. I found the Casio Pathfinder easier to use. The only issue I had with my watch is sometimes it went into conflict and went through all the modes and would not stop until the batteries were removed. I was the only one that had this issue. We worked in extreme environments, and the watch took a beating:  sand storms; attacks of all types; crashes; high heat 125-130 degrees; and cold below zero for long periods. All the features were a great asset to all of us. We often compared data with our other instruments like GPS and other sensors we had. The watch was close. The large dial is a plus in the field.”

Incidentally, the original post with that review can be found here:  http://hawksbillcabin.blogspot.com/2009/12/tech-watch-geek-maybe-winner.html


I never put that first Pathfinder to the kind of test that Bart did, but I suppose that all of the hikes and trips I took it on did serve up some abuse.   And now I have the new one – I’m looking forward to where and when I will set the new records with it.

Monday, April 1, 2013

Tech-watch Geek: My Casio Pathfinder Watch

All ones on the display - 11/11/11.
I've made no secret about how much I love my Casio Pathfinder watch.  Unfortunately, a few weeks ago I noticed that it would not take a compass reading, and then I couldn't get an altimeter reading - with hiking season upon us, I was very worried that I might be losing this very functional tool.

Then over the weekend, the display began to fade and the alarm's happy chirp has changed tones just perceptibly.  I'm guessing this means it's time for a battery change, which we'll take care this week.  I'll probably lose my to altitude records - the highs and lows - so that's the real reason for this post.

I took my highest altimeter reading in Yosemite in 2010 - it recorded the height as 2,315 meters without any adjustment for barometric pressure.  That's just about 7,200 feet - that's one of the photos here.
The scene of my highest altimeter reading.

My lowest reading was -150 meters, taken in Death Valley in 2011.  Again, with no adjustment for barometric pressure, that translates to -465 feet.  Here is a photo I took during that trip.

The scene of my lowest altimeter reading.


Of course, the first photo of the watch in this post was the moment of all ones on the display, taken at 11:11:11 on November 11, 2011.  That was a fun moment - I was very nervous I would miss it.

I'll close today with a link to a page with a nice selection of Casio Pathfinders over on Amazon - in case you might be looking for a referral to there:

Casio Pathfinder Watches On Amazon

Monday, November 21, 2011

Tech-Watch Geek: Casio Protrek and Pathfinder

Half Dome from Glacier Point, Yosemite - highest altimeter
reading on my Pathfinder was here: 2,315 meters...
(give or take)
As I was departing Japan last January, I saw a display of Casio “Tech-watches” in Narita Airport. Since they were branded “Protrek” – as opposed to the Pathfinder I wear – I was interested in learning more about them, with the idea of eventually getting a post up here on the blog about my new discovery…unfortunately, I did not save the photo I took in the airport (but I’ll liberally sprinkle in some archived action shots of my Pathfinder!).


What I’ve learned, and I’ll stand corrected if anyone comments with more information, is that the differences between the watches is essentially a marketing issue; namely, there was a copyright in the US on the brand name Protrek so this label was reserved for other markets. The brand for markets where the Protrek copyright was in place became Pathfinder.

Taking a Pathfinder reading in Death Valley -
later that day I recorded the lowest reading
on the Casio of -110 meters.
Now, although my discovery of this brand was recently, in January 2011, apparently the marketing extends back as early as 2008. My experience in Japan had been that the technical features, such as the triple sensor altimeter/barometer/thermometer feature, time and tide info, and even solar charging, were similar, but there was a distinct fashion emphasis on the Protrek line that I don’t associate with the Pathfinder – and that led to a bit of a price point difference, with the Protrek being a little more expensive. Again, this is my impression, glad to post differing views on this one. 

I did a little further research on the differences, and found a YouTube video that demonstrated one of the Protreks – embedded below; there was also a post on the “Poor Man’s Watch Forum” that compared the experience of using the two brands on hunting expeditions (black bear and white tail deer, for the record!) The link to this review is here, and the YouTube embed follows.
http://www.pmwf.com/Phorum/read.php?26,23482


Okay, here's another:


Now, I got my Pathfinder (similar to the ad over there in the right column ) as a holiday gift from Mary a few years back. I am delighted with it and use it all the time, especially for altitude readings and a quick check of bearings with the compass. Click the Tech-watch Geek label at the end of the post for reviews of it and other watches with these features.

But the thing that sold me on the Pathfinder was a soldier’s review…the link to the post where I discussed that review is here:
http://hawksbillcabin.blogspot.com/2009/12/tech-watch-geek-maybe-winner.html


I’m not going to pull punches. I love this watch. Still, I thought with the holidays nearly upon us (“Respect the bird!”) that I might break into a quick survey of the popular Tech-watch brands to see what’s happening with the lines this year. There’ll be a few more posts on the topic…!

Friday, October 14, 2011

The Tech-watch Geek Visits Death Valley

I've been in Las Vegas this week, and since I found some time on my hands I decided to make a day trip up to Death Valley National Park.  Among the things that the Park is famous for is Badwater Basin, officially the lowest point in North America, at 282 feet below sea level.

In addition to the sightseeing - I'll put up photos over the next few posts - this fact gave me the opportunity to geek out a bit with the altimeter function on my Casio Pathfinder watch. 

Plug here:  You can check out the Pathfinder on Amazon.com by clicking the add on the right.  :-) Thank you.

Last year, during my work trip to Yosemite, the Pathfinder took an altitude reading of 2,315 meters, or approximately 7,177 feet.  I took the reading at Glacier Point on one of our drives back to the hotel; the original post with spectacular photos is at  http://hawksbillcabin.blogspot.com/2010/07/yosemite-second-day-post-3.html. By the way, looking back at that post, the margin of error for that altimeter reading wasn't bad - less than 10%, which I find very tolerable for my use of the altimeter function.  I typically expect an error of up to 20%.

So with that in mind, I was looking forward to the prospect of recording a new low reading on the altimeter, and for that, Death Valley didn't disappoint. 

One of the first steps I take when geeking out with the altimeter is to find a reference altitude, which was very easy to do in Death Valley National Park.  As you come over a final ridge before arriving at the Furnace Creek Visitor Center, there is a big sign designating Sea Level - and from that spot, elevated as it is from much of the surrounding landscape, it's pretty clear you'll be spending a lot of the time during the visit to the Park at altitudes below sea level.

So I took my first reading near the sign, and recorded -45 meters, which I noted would mean an altitude of "0" for most of the day.

Driving on downhill to the visitor center, there's another sign marking 100 feet below sea level; I hastily took another reading and got -70 meters.  Adjusting that by 45 meters gives -25 meters, or -78 feet.  That's a pretty big error, but I did take the reading while driving using the auto function, so that reading could have been a few seconds old when it was recorded...

I kept the watch on the altimeter function for most of my time in the Park. I enjoyed observing the readings from time to time and watching them alternate between above sea level and below.  Finally, I arrived at Badwater Basin, my objective, as shown in the photo at the beginning of the post. 

My Pathfinder altimeter reading at this spot was -150 meters; as I mentioned, the watch has recorded this as the lowest altitude I've taken a reading at so far.  Adjusting for the -45 meters margin of error, we get -105 meters, or roughly -326 feet.  The reading was about 44 feet off, indicating that I was further below sea level than the actual elevation, and the margin of effor was off by around 15%. 

That is usually good enough for me - I mainly use the altimeter to give myself an idea of my progress on a climb or descent while hiking.  I don't expect or require precision on these readings, just need an idea of how much elevation is left to the particular effort I'm involved in.  There are other instruments to use if better precision is needed.

(I should mention that the mountains that surround Death Valley are quite high - to the west, they reach to just more than 11,000 feet above sea level.)

So, for the record, the established high and low points for my watch are:

High Point:  Glacier Point, Yosemite National Park, 2,315 meters (approximately 7,177 feet) recorded July 20, 2010.
Low Point: Badwater Basin, Death Valley National Park, -150 meters (adjusted for errors, 105 meters; translating to -326 feet), recorded October 12, 2011.

These are nominal readings, as I discussed above.  And between the highs and lows, we have all those readings in my beloved stomping grounds back at Shenandoah National Park.

Wednesday, September 21, 2011

Doyles River/Jones Run: A "75 @ 75" Hike

Jones Run Waterfall - 42 feet.
Knowing that I had a big hike planned for the upcoming Saturday, and because I’d planned to take that hike with neighbor Dan, who not only recently had completed a half marathon and is a GIS specialist at the Park, but also is one of the few people on the planet who has walked every footstep of Skyline Drive, I went looking for a warm-up hike on Wednesday, September 7. I chose the Doyles River/Jones Run combination because of its length and elevation, and because all of the waterfalls on that trail would give an interesting destination. Incidentally, I’ve hike the entire circuit of this trail before, you can find it under the “Day Hikes: Moderate” label.


Google Earth route for this hike.
When I do warm-up hikes like this, they don’t necessarily have to meet the rigorous qualifications I’ve set for “75 @ 75” hikes, although this one, at 5.8 miles and 1,120 total elevation gain, certainly met the requirement (a combination of at least five miles in length and 500 feet of net elevation gain). I thought that two days of rest between the warm-up and the actual hike would be enough, but my legs still stung from the lactic acid on Saturday morning as we made our way to the Wildcat Ridge trailhead for the main hike – which I’ll review later this week.

Before getting to the details of this one, I want to make a note about how I calculated elevation on this one. Normally, I’ll just take an altimeter reading on my Casio Pathfinder along the way of any given hike, catching the highest and the lowest point s. When I make the blog post about that hike, I simply subtract the lowest from the highest for net elevation, and that’s what I report – which typically will vary, for several reasons, including barometric pressure variations or the fact I don’t count “pointless ups and downs,” or PUDS, in my calculations.

Casio Pathfinder check point.
Elevation reference point.

In this case, I knew I was in for a descent from the trailhead down to the confluence of Doyles River and Jones Run, and then another climb to the Jones Run falls. As shown on the photos of the park markers, the altitude of these three locations were 2,200 feet, 1,480 feet, and 1,880 feet, respectively, giving a total climb of 1,120 feet. For reference, the 580 meters read out on my Casio translates to 1,798 feet, 400 or so feet off of actual, which is a typical variance due to the barometric method used by the watch – by the way, the operator’s manual suggests taking this kind of reading for reference early in the hike.

On to the hike: I decided to start from the Doyles River side, since that was a section of the trail I had not been on, since Chris, Tom and I had cut back along the fire road on our previous hike. This meant my route would follow Doyles River most of the way to the confluence with Jones Run, then make a southwesterly turn to begin the climb up to the trail alongside that watercourse.

Doyles River lower falls.
Doyles River upper falls.
Three waterfalls are the feature of this trail, two on Doyles River and one on Jones Run – the Jones Run waterfall is among the ten highest in the Park, at 42 feet. Both streams flow down steep gorges, and there had been some strong rains recently, so the sound of many smaller waterfalls and cascades accompanied me on the walk on those trails. Both waterways are designated trout streams, so with your license you can enjoy catch-and-release and harvest fishing.

There is a PATC cabin not far down the route on the Doyles River side, there is a nice stream there also. I met a couple who were staying the Labor Day week at the cabin; their two lab mixes could not stay out of the water during the hikes. Later, coming back, there were three does drinking from the stream at this same place, I was downhill and downwind from them so they were surprised when I suddenly appeared only 10 feet away!

One of the plentiful cascades along this route.
“Shenandoah Secrets”, a PATC publication by Carolyn and Jack Reeder (Amazon link at the end of the post), mentions that there was a lot going on in this area before the Park was founded – lumber mills, two distilleries, and farms. There was even a dedicated rail line here to support the timber industry, but today it would be challenging to even find a trace of these, even though they are reported to have been located near the spring.

The Heatwole book speculates that Confederate General Jubal Early used this area for a strategic retreat to regroup and reinforce, since there were probably pastures in the area and the steep rocks cliffs would have made Union General Sheridan’s pursuit difficult. Heatwole acknowledges that this is conjecture, there’s no record at these locations; only the reporting that the events took place nearby.

While, this hike wasn’t one of the planned efforts from my “75 @ 75” project, it turns out that it qualifies, so I’ll count it; as of the last status report I still have about 25 miles to go before Thanksgiving to meet my goal…which I hope to exceed. The next hike I’ll review is the Wildcat Ridge/RipRap Hollow Trail; this trail was a warm-up for that one.

Amazon link to the PATC Shenandoah Secrets book:


Monday, July 25, 2011

Plan B Weekend: Hazeltop Summit


With the onslaught of 100-degree plus days, hiking partner Tom and I decided it was best not to take on one of the “75@75” hikes this weekend. We had planned to do the hike that combines Pocosin Cabin and South River Falls, which would be convenient for him and me. He had a campsite reservation at Big Meadows and wanted to do something to take advantage of that, and of course, I am anxious to make the miles, so we came up with something that would meet the criteria for 75@75, but allow us to take frequent breaks.

That “Plan B” was to summit the three tallest peaks in the park: Hawksbill, at 4,049 feet; Stonyman, at 4,010; and Hazeltop, at 3,850. We could do each of the three day hikes to these, around 2-miles each, and also manage to ascend about 1,500 feet in elevation. We would car shuttle between trail heads, allowing some air conditioned cooling off and ensuring that we had plenty of fluids. Even so, the mileage and elevation gain would qualify this effort as a 75@75 day for me.

In the end, the temperatures were just too high to take on this effort. Tom ended up canceling his campsite, and I went out to Hawksbill Cabin to check in on things – and sit in the pool for an hour. By Saturday afternoon, I started getting news that the temperatures up on the mountains were at least 10 degrees cooler than in the valley, and I really still wanted to get up there for a leg stretcher.

On Sunday, I decided I would head on up to do the Hazeltop portion of that segmented hike – from the Bootens Gap Trailhead, estimated at about 2.2 miles round trip. I had been to the summit of Hazeltop with Chris when we did the first of the 75@75 hikes, the big loop down to Camp Rapidan. That was a foggy day, with rain at times, so there was no view, and I had planned to come back to check out the views.

With the canopy up, I didn’t expect much of a view on this day, especially through the sultry haze. In reality, I was just looking for a cool breeze, and a complementary view would have been nice.

From the trailhead – this entire route was on the AT, by the way – both the south and north directions look inviting. But I was headed north and uphill, first passing the intersection with the Laurel Prong trail, which leads down to Camp Rapidan, and then on up to the summit.

There are beautiful summer wildflowers all along Skyline Drive right now, mainly Black-eyed Susan. However, I had noticed a few Turk’s cap Lillies – also known as Carolina Lillies – as bright orange highlights, and had been tempted to stop and take a photo of some. I kept my fingers crossed that I might see some along the hike, and I did – I’ve got a photo of a pair here as the opening image.

(Note, something's up with the Blogger interface today and I can only upload one image, so I'll come back to post the others later.)The other photos are some views of the trail, and a few of the rock outcroppings and boulders along the way. The last of these is the one that I took my summit altimeter reading from, although it probably wasn’t the actual high point of the mountain. I remember that it was pretty close from the last hike, when I approached from the other direction; walking ahead a few dozen more yards revealed that you began a descent from this point onward.

By the Pathfinder’s altimeter, I climbed about 530 feet on this short hike, although by official altitude readings, it may have been more than 600 feet. In any case, I found my cool breeze at an AT switchback, where a little canyon tapered down of the hill. A storm was rolling in, and it sent some brisk cool air up my way from down in some stream bed below.

Wednesday, July 20, 2011

Tech-Watch Geek: New Entry by Wenger

It's been a while since I did a post on multi-function "adventure watches" - a favorite topic.  This month's Outside has a little spread that includes a Timex Expedition (although technically not a geek watch in my book because it's not a multi-function watch) and, of course, a new Suunto Elementum model; however, the one catching my attention in the article is the Wenger Nomad LED.  It's a very stylish black and red job, with a stated retail price of $375.

Now, the photo above was downloaded from the Wenger web site ( http://www.wengerna.com/ ), it is a partial shot that shows the watch in the compass mode, where the LED indicator lights up with the azimuth reading.  The company's posting says this:

"Designed for the modern nomad, the active outdoor enthusiast who’s always on the move. The Nomad Compass 70430 is a multi-functional timepiece with an attractive analog dial, and a stealthy red LED digital readout which features a compass, date, day and time, to always keep you on course."

I've also linked to an Amazon page at the end of this post, where it is offered for quite a bit less than the stated retail.

It is a very sporty watch, and looks to me like it could cross over easily from outdoor activities to casual wear.  This is confirmed by the reviews on Amazon, which give it an average of four stars - there are 3 5-star ratings, 4 4-star ratings, and 2 3-star ratings.  The most succinct review is a 3-star rating by "MMA Guy:"

"Pros:

-It is heavy, durable, and has a quality feel to it. It's a Wenger of course
-The compass feature is awesome and it works fairly accurately
-Easy to follow instructions
Cons:
-Very weak illumination on the numbers even when charged by external light sources.
-No illumination on the hands at all, then why would you illuminate the numbers?
-No way to tell time in the dark aside from pressing the digital time. "

From this and the other reviews, the most frequently mentioned positive feature are the good looks and quality feel, but from my summary look it doesn't appear to stand up well to my Casio Pathfinder or to the Suunto Elementum on the geek factor.  Both of those offer an altimeter and thermometer in addition to the compass.  And the reviews for those brands often include one or two from users who put their watches through true-hardship (I chose the Casio because of a review from a soldier in Iraq, who said half his unit had the same watch and the other half had the Suunto!).

As for the negatives, there is a mention of some difficulty with the packaging, but this is not an inconvenience that lasts too long.  The other note is that the stock strap may not fit everybody, addressed by buying an alternative one from Wenger or elsewhere.  And there are a couple of complaints about the illumination of the analog timekeeping function - hands and digits.

So bottom line, it is a good looking watch with some functionality.  But if your looking for a harder core watch, maybe one of the other brands is for you.

Friday, March 18, 2011

Tech-watch Geek: The Suunto Core Everest Extreme (Again)

A short follow-up post on the Suunto Core Extreme Edition Everest watch that I reviewed in December (link to the original post at the end of this one)-


Last week, I stopped by one of the outfitters near my office, Eastern Mountain Sports, where I saw that they had one of the watches on display. They actually have a selection of 20 or so watches, along with other technical gear of that type. I asked the clerk to let me take a look, and so I have these photos to share.


First, a look at the watch face, bezel, and band: there is a high-viz orange finish on the bezel that makes this an attractive watch, and typical of the Suunto Core, the LCD display makes reading key data easy. Then on the reverse, there is the signature reproduced from Apa Sherpa, who has summated Everest 20 times and whom Suunto honored with this watch – this signature appears on all 8,800+ copies of this limited edition.

Looks nice…I remain sorely tempted!

As far as price goes, the outfitter had it at the recommended retail price of $399. Amazon, linked below, has it for slightly less (a couple of used watches are offered there at around $300).  I've found a couple of other vendors pricing it at the list of $399...a portion of the sales price benefits the remote village near the Everest Base Camp, so I wouldn't expect any discounts on this limited edition...Happy shopping!


Here is the link to my original post on the Suunto Core Everest Extreme edition:

http://hawksbillcabin.blogspot.com/2010/12/tech-watch-geek-suunto-core-extreme.html

Tuesday, March 8, 2011

Camp Hoover: A Moderate SNP Day Hike

My hiking group decided that this hike, the Camp Rapidan/Camp Hoover hike, would be a goal for us this weekend, offering an alternative from the GWNF routes we’ve been doing the last few years. Also, this hike would become the first of my “75 @ 75 Project” hikes. In the end, only Chris could join me, but we’re looking forward to several more outings to come.


For the last year or so, we’ve gradually become aware that 2011 is the 75th anniversary of the founding of Shenandoah National Park. After completing those “Easy Day Hikes” last year I’ve been looking for a new project in the Park, I’ve decided to take inspiration from the anniversary and set a goal of hiking 75 miles in the Park this year – thus, the 75 @ 75 Project.

To start out the spring hiking season we were looking for an alternative to our normal GWNF hikes, since Crissman Hollow Road over there is closed until April. We chose the Camp Hoover Hike from Hiking Upward (URL below*), which the site describes as 7.6 miles with 1,320 feet of elevation gain. The Heatwole guide lists the trail version we took as 7.4 miles with 1,520 feet of elevation gain, so take your pick unless you’re measuring it yourself – in either case, I consider this a moderate outing…and a pleasant one.

Heatwole** also lists a shorter, slightly steeper hike of 4.1 miles and 870 feet of elevation gain; this one is in the Easy Day Hikes book and Mary and I had taken it before. Both of these hikes begin at the Milam Gap Parking area, mile 52.8 on Skyline Drive, just a few miles south of Big Meadows. If your group is short on time, or if there are children in the group, this second route offers a pleasant hiking adventure.

After driving along Skyline Drive from Thornton Gap, and encountering the remnants of the ice falls on Stonyman, this hiking adventure begins at the parking area. There are quite a few old apple trees and a split rail fence here, reminders that the area was settled before the Park was established in 1936. There’s a book about Camp Hoover available at Big Meadows, it provides a lot of detail about this area before the president took an interest in setting up his getaway.

Our route took us along the Laurel Prong route, so we started with a 2-mile section of the Appalachian Trail. It gently climbs along a ridge, gradually becoming steeper as you approach the summit of Hazeltop Mountain, the third highest peak in the Park at 3,812 feet or so. After enjoying the views along a straight stretch of the AT, shown in the photo, there is an overlook close to the summit, but it was obscured by fog on our hike.

Since there were no views to be had, I took a couple of photos of the rocks along the ridge, and one of a fir tree. I’ve read that the firs at these altitudes are at the far southern reach of their natural range – that’s some research I need to get back to. In any case we had a fine specimen here.

Soon after the summit, you’ll reach a concrete post where the blue blazed Laurel Prong trail intersects the AT. For the next two miles or so, you’ll gradually descend along the east side of Hazeltop before an intersection with a yellow blazed fire road and horse trail that leads to Camp Hoover. There are stands of rhododendron here if you are lucky enough to catch them in bloom, and the area includes several minor stream crossings and second growth woods from past clearings – either settlements, or areas that supported the presidential retreat.

Finally you arrive at the Camp Hoover area, where there are still three buildings left from its heyday. There is an historic marker and plenty of interpretive signage and the Prime Minister’s Cabin is set up with a museum that is seasonally open. You can check at the Big Meadows Visitor Center for ranger programs here – our friend Sally is one of the rangers that guides those visits from time to time. The other two buildings left are The President, where Hoover and his wife Lou stayed when they were at the camp, and the Creel, which is where his aides stayed (it is now used by in residence docents, who stay the season in the building).

Chris and I had lunch on one of the terraces and explored the site. There were a couple of trout fisherman hanging around – well geared up, but doing catch and release. It is one of the features of this area that the Laurel Prong and Mill Prong confluence, just below The President, becomes the Rapidan River here and joins the Rappahannock downstream. You can imagine the cheerful sound of these streams providing a restful backdrop to the pressures of Washington in the throes of the Great Depression.

For our route, we decided to climb out of the hollow via the Mill Prong route, another 2 miles or so uphill. A final treat was there to greet us: Big Rock Falls, which was going strong in late winter. The stream itself had a good flow going, so the cascades and eddies were good accompaniment to the climb.

After leaving the White House, Hoover donated the camp to the effort to form the Park. It has been used as a scout camp, and there are some photos of that era around, but I think those activities ended in the 1960’s. Today it is still used for some official functions, but mainly it is a reminder of the 1930’s era and the history of Hoover’s presidency.

I remembered my Pathfinder watch this time, and kept a simple record of the hike, as follows:

  • Trail head: 865 meters/2,682 feet
  • Hazeltop Summit: 1,050 meters/3,255 feet
  • Camp Hoover: 655 meters/2,031 feet
I recorded a total elevation gain of approximately 1,224 feet, since I didn’t calibrate the watch on the route, the difference in my records from the other sources is typical.

* http://www.hikingupward.com/SNP/CampHoover    
** Guide to Shenandoah National Park and Skyline Drive, 4th edition, by Henry Heatwole – now also available as a web resource

Tuesday, February 1, 2011

Strickler Knob: A Moderate (and incomplete) Day Hike

Our hiking group set out on the enterprise that is Strickler Knob a few weeks back. We had just heard too many good things about the trail from the gang at Appalachian Outdoors Adventures, and the reviews of the hike on Hiking Upward were very tempting. Never mind that we chose possibly the very coldest day of the January to make a go of it – the temperature was 20 degrees at the trailhead – or that I was still a bit jetlagged from my trip to Japan. I can never resist a mountaintop view of Page Valley, so it was easily decided.


With Tom and Andy coming down from Leesburg, and Chris and I setting off from Hawksbill Cabin, we set up a 9 am rendezvous at the Southern Kitchen. On the way to the meeting point, Chris and I drove by the trailhead parking area to make sure that Chrisman hollow was open – it was; we also continued on down to Scotthorn Gap to make sure that we could park there, since I thought we might reconsider the main route for the day.

 
Our plan was to use the Massanutten trailhead and hike down Waterfall Mountain to the gap between it and Strickler, head to the crossroads where Scotthorn Gap trail comes in, and then up the spine of Strickler Knob to the summit. Hiking Upward (no link today because their site won’t open, I’ll correct this later) has the total distance of 9.5 miles for this hike – very aggressive for our first hike of the season, but Strickler has been looming over us for a couple of years now and the gang was chomping at the bit to complete it.

 
This hike also has pretty significant altitude change, so I was prepared with a Plan B and Plan C when we met the guys at Southern Kitchen:

 
  • Plan A – the whole shebang, 9.5 miles, from Hiking Upward;
  • Plan B – the shorter, 5.5 mile trail from the trailhead at Scotthorn Gap; or
  • Plan C – a car shuttle, starting from either trailhead after leaving cars at both, shortening the trip to 7.5 miles.

Over a hearty breakfast, we chose Plan C…we’ve come down from Duncan Knob and Old Rag in the dark before(in fact Chris and I did the last 3 miles of Half Dome in the dark in 2005), something we didn’t want to repeat, and we decided that 9.5 miles would guarantee that same result again. (FYI, a link to Southern Kitchen is here: http://www.roadfood.com/Reviews/Overview.aspx?RefID=427 )

 
I’ve already mentioned how cold it was starting out. I had prepared with long underwear and flannel lined jeans, I knew I had to be careful of getting them wet, but the streams were hard frozen and that wasn’t going to be a problem. The other guys chose technical hiking pants over long underwear – I think everyone was okay for the cold, but as we warmed up from hiking it was challenging to stay comfortable.

 
From the Massanutten Trailhead, Strickler is a hike that doesn’t cut any slack. About a quarter of a mile in, there is a half mile long descent that plunges 800 feet in a series of switchbacks on a rocky trail – challenging footing with winter leaf litter still covering the trail and with icy spots here and there in the shade. Andy and I synchronized our Casio Pathfinders and both got good readings on the altitude change, I’m glad to say. Chris didn’t fire up this feature of the Suunto, so we didn’t compare Tech Watch results.

 
From the bottom of that descent to the next waypoint, the crossroads with the Scotthorn Gap trail, is about 2 miles. There is a gentle climb over this distance, and the path more or less follows a stream, which you cross twice in this valley. It was very pretty in this hollow, given the cold and the fact that the leaves were down. But you could hear the happy little stream under the ice, and nobody was complaining about the trail difficulty at all.

 
From our past experience, our worries about running out of daylight were driving us. Our usual pace is about a mile per hour on these hikes, and we knew that wouldn’t be good enough – it’s why we made alternate plans. Still, at one point, we did one of these miles in a half hour. I think it was part of one of the old furnace roads, and footing was tough, but we really covered that distance.

 
At last we reached the way point, slung off our packs for snacks, and reconnoitered our situation. We were at the start of the ridge trek for this trail, with about an hour to 90 minutes of daylight left, with 3 miles of rock scramble to look forward to before getting back here, only a mile to a mile and a half on an easy fire road trail from the car. The math wasn’t working, so we had to bag it.

 
Still, all in all, a good workout of about 5.5 miles, and now we are more familiar with this trail’s logistics. We’re going to take it on again at some point this winter, maybe early spring (we prefer not to do the rock scrambles in the summer due to snakes sunning themselves on the rocks).

Friday, December 17, 2010

Tech-watch Geek: A look at Tissot's T-Touch


In keeping with some of the adventure topics that I post about here on the blog, I do a lot of reading in outdoor travel magazines like Outside and Backpacker. Whenever an adventure watch is featured in their gear reviews, I take an extra bit of time to read those articles, so for the last couple of years I have been keeping an eye on the Tissot T-touch series of watches.


These are high-end tech-watches that usually feature an altimeter, thermometer, compass, and other features. The difference is the touch screen interface that is accesses through the watch crystal; depending on where you touch the screen you will access a feature and the result will typically be displayed on an LCD screen.

Tissot has a nice range of styles and colors to choose from, and they have a pretty cool “reality” feature on their website, which allows you to virtually try these very fashionable watches on with the assistance of a web cam and a special bracelet. Your humble tech-watch geek blogger does not have access to any of this technology, so we’ll have to settle for my scan of some Amazon reviews.

Most of what I read on the high-end and newest generation watches was high ratings from enthusiastic owners. Apparently, there were early spotty problems with the touch screen technology, and there are still some signs of this showing up in the entry level versions.

However, there is a NASCAR version, which I have included an ad for below, and the steel bracelet “Sea-touch” at the top of this post are nice looking. I am satisfied with my Casio Pathfinder for now, but if I ever go back to being a jacket and tie guy at work, I might consider an upgrade to a dressy version like this Sea-touch.

Now for some Amazon review highlights…

"…(The Sea-touch) …has an altimeter, thermometer, compass and a few other features, most of them work just as you would expect them – flawlessly, the watch looks great, you will receive a lot of compliments. It does look good. While I have read on some places that the watch in itself is kind of hit or miss on the waterproof department, it has not been my case, mine works flawlessly, the compass works great and will let you know where are you headed to. I have more than 2 years with it, the rubber band holds its own, the watch keep working and other than a few scuffs on the case everything works fantastic."

And a second:

"If you hung on this far, here's the real reason I considered this watch in the first place, the Touch interface. A firm press on the center button activates the touch interface and away you go. The rubberized buttons on the "crown side" are completely sealed and can be used under water to activate the functions while immersed. I was surprised that the button press needed is quite firm and takes some getting used to. But, I'd rather it be that way than constantly activating my watch and wearing the battery down. I have yet to dive with my new watch but, I will remedy that this weekend…The luminous markings are tremendously bright even after a short exposure to light and you still have the red back light if you need it, although it requires you to hold that button firmly for a few seconds to get it to light up.…this latest generation of touch technology is pretty much bug free and has been around for the better part of a decade."


Friday, December 10, 2010

Tech Watch Geek: Suunto Core Extreme Edition Everest


The Amazon product review starts with a quote:


“With the right information and the right attitude, anyone can successfully take on some of nature's greatest challenges. Enter the Suunto Core Extreme Everest Edition watch, which not only supplies all the information you need, but also includes legendary sherpa Apa Sherpa's signature engraved on the back. The attitude is up to you.”

I saw this watch in the December issue of Outside, it is one of four featured in a gift section. There are no reviews on the Amazon site yet, but Suunto’s are popular and the company has built a large following for their tech watches.

Features include the typical altimeter, compass, and barometer (although Sunnto calls this feature a “storm alarm”) – but this is the Everest special edition, and the Amazon description includes loads of features, some of which I’ll summarize in this review:

• Total ascent/descent: Yes

• User-removable logbook files: Yes

• Automatic Alti/Baro switch: Yes

• Automatic 7-day Alti/Baro memory: Yes

• Resolution: 1 meter

• Real-time vertical cumulative value: Yes

• Altimeter/barometer lock: Yes

• Altitude range: 1,600 to 29,500 feet

• Countdown timer: Yes

• Stopwatch: Yes

• North-South indicator: Yes

• Guided calibration: Yes

• Temperature resolution: 1 degree F

• Trend indicator and graph: Yes

• Temperature range: -5 to 140 degrees F


For Suunto, this guided calibration feature is an important feature. Past reviews of their watches have mentioned the difficulty with calibration – a factor that hasn’t impacted their popularity, but a challenge.

So, why the reference to Everest? First, they’re only making 8,848 of them – the mountain’s height in meters. Also, this one includes an engraved signature of Apa Sherpa, who has summated Everest 20 times.

The watch is listed at $429, a bit higher than the tech-watches I usually review in these posts, but Amazon has it for $399 (see ad link below). And maybe what you’re getting in altitude resolution (1 meter) and temperature resolution (1 degree F) is a requirement for your adventures. The high-vis orange bezel gives it a sporty look, too, so it is hard for me to say the extra bucks aren’t worth it – especially when the Tag Heuer Monaco 24 in the Outside spread lists for $10,900…

I posted an update to this review in March 2011, including some photos of the watch and a price update.  You can find that here:
http://hawksbillcabin.blogspot.com/2011/03/tech-watch-geek-suunto-core-everest.html

Friday, December 3, 2010

On Top of Old Stonyman

To close out our holiday weekend, Mary and I decided to take a drive on Skyline Drive, choosing the little Stonyman trail for a season-ending adventure.  It was a very clear, if bracingly cold day, and with most of the Park's lodging and dining facilities closing, we figured we might come close to having the place to ourselves.

That's almost never the case at Shenandoah National Park, due to its proximity to DC, Baltimore, Richmond, and other east coast population centers.  But it does slow down and there are times when you'll find excellent surprises.

The temperature was hovering around 30 degrees once we were up at altitude - enough to freeze the little rivulets you often see on the back side of Stonyman.  Later on in the winter, these will be bonafide ice pillars, but for now they are just getting their tenuous start.

Here's a pair of views from the summit, one looking to the north and over Lake Arrowhead, and the other a westward view that includes much of the town of Luray. 

It's not something I do all that often, but while we were at Skyland, I put a quarter in the telescope machine there on the veranda and took a look at the town.  With the leaves down, you really can get a nice view from up there.  I imagine you'd have this all to yourself at times during the winter if you wanted to make a picnic on a warmer day.

There weren't any traces of the fall fires we had the previous week.  With black powder hunting season over, maybe there won't be anymore...just saying.

Another thing interesting about the view from up there on this day was the notable inversion layer to the west of Massanutten.  Traffic was crazy on I-81, we were told, and maybe that's what was causing that dirty haze over in that part of the Valley.  I thought it reminded me of Denver, or Los Angeles...

For a final shot of the day, here is a tech watch geek update.  I remembered to turn on my Pathfinder's altimeter function as we were coming back down from Stonyman summit.  When we got to the intersection sign with altitude, I checked my reading - it showed 1,060 meters, same as it did the last time I passed by the sign, last week!  That's 3,286 feet, so a typical adjustment had to be made with the reading...but I am surprised that I got the same altitude two times in a row.  Maybe I am onto something.

While the majority of Park facilities closed for the season this weekend, Skyline Drive remains open for the winter, except during inclement weather.  I'm looking forward to a few little excursions this season if I can get my little hiking group up for it.

Wednesday, November 24, 2010

2010 Tech-watch Geek Series


It's getting to be holiday season, and I like to check in on all the "tech watches" at this time of year.  So let's get started!

Of course, I have a Casio that I have been enjoying this year since Mary gave it to me last Christmas.  I used the altimeter function most recently last Saturday up on Stonyman Mountain, where I took this measurement.

Here you can see I have a reading of 1060 meters, or about 3,286 feet.  My reference point is the sign, which says that the actual altitude is 3,837 feed.  This variation is typical for altimeters reading barometric pressure...it's important to find a reference point like this handy sign early in the hike to peg the variation.

Weather factors can introduce variation as well, once again reinforcing the need to have a good reference point.  Then you can better evaluate variation that seems to change too rapidly - after all, it could be a storm moving in, and you don't want to be caught by surprise.

FYI, here is an Amazon link to the Casio Pathfinder like mine...I'll take a look at this year's offerings from Suunto, Tissot, and Tech 4 oh over the next week or so.

Wednesday, August 25, 2010

Lewis Spring Falls - an Easy Shenandoah Natl Park Day Hike

While I am behind on several posts in this category - I'm planning to catch them up next month in a hiking spectacular - Mary and I decided we might go up to the Park last Sunday for a little hike.  I mentioned the butterflies and wildflowers in the post yesterday; we encountered them on the short hike we took down to Lewis Spring Falls.

In my "Easy Day Hikes" book (Amazon link below) this trail is described as a 3.3 mile loop that descends 990 feet.  I've done that one before, and while I was doing it found that you could short cut some of the loop by taking a fire road down to where it intersects the actual trail to the falls.  On reading the guide book again, this route is mentioned as better for families with young children - and indeed, we encountered a couple of families on the route.

The alternative route turns out to be about 2 miles long, but it still descends (and climbs on the return) almost 800 feet.  I took altimeter readings at the Big Meadows Welcome Center (3,535 feet), where we parked, and at the Falls (2,776 feet), so I came up with a total climb/descent of 759 feet.  Although the temperatures at altitude were 10 degrees cooler than in the Valley, it's still important to be sure that you bring plenty of water for this route.

I like this waterfall - Heatwole lists it as the fourth tallest in the Park at 81 feet.  The view of the falls from the overlook is very pretty.  At the top of the falls, where the water leaps from the cliff, there is a ledge that offers a view to the west, overlooking Tanners Ridge - also worth a stop. 

Those views alone make this a pleasant trip, but for me, because this is one of the headwaters of Hawksbill Creek, which flows through Luray along the Greenway, I especially like significance of this location.

Once we climbed back to the car, we drove to the Big Meadows Lodge for a short break.  There is a lot of construction in the main building this year, while they update the balcony that looks over Page Valley.  We walked over to Black Rock, the southern summit just a few yards from the lodge, and looked down to the Valley - you can see the Jordan Hollow Inn and Wisteria Vineyards from this view point.

We topped it off with a stop at the Big Meadows tap room, grabbing a quick lunch.  Then it was back to the Valley to enjoy a few hours on the brick terrace before packing up for Alexandria. 


Thursday, July 15, 2010

The Tech 4-0 Trailheader - a Tech-Watch Geek guest post

Today, I'm re-posting from Gary's gear blog (  http://runtechinthevalley.blogspot.com/ ) - he's been using a Tech 4-0 watch on his adventures and recently put up a review post.  With his permission, I edited it slightly to fit my blog.

Gary's blog is a companion blog to Howard's Adventures in the Valley blog, which is  here:   http://adventuresinthevalley.blogspot.com/

Although they have the watch in the store in Luray, for reference, I have an Amazon link at the end of the post.

"I am going to blog about the gear that I personally use for running and cycling here in the Shenandoah Valley, what I like, don't like and why. These are just my personal opinions. I am a triathlete (for a number of years with two ironman races under my belt) and have recently started trail running and now adventure racing. I hope this blog can be helpful to anyone who is looking at gear and equipment for being outdoors.

The first piece of equipment I will talk about is the Tech 40 Traileader Pro watch. I had been using the Freestyle Nomad and the first thing that I noticed about the Traileader was that it is noticeably lighter on the wrist than the Nomad. As with all of these multi-function high tech watches the learning curve is a little steep, for me anyway. It took me about 3 hours to get the watch set up and using it in a basic way. The pictures in the directions do not match the watch face so it is a little confusing.

The Traileader has two menus, a time menu and a trail menu. Once you get the hang of it you can switch back and forth fairly easily. On the time menu you can run through the altitude, barometric pressure, and temperature quickly without having to go into the trail menu. It also has a running distance/running time mode which I really like. No more pedometers! The watch face is large which I like also because I can read it without having to need my reading glasses.

All in all I prefer the Traileader over the Nomad and it is now my Adventure watch.

"Thrive Outside"
 

Monday, June 14, 2010

Tech Watch Geek: Nearly Optimal

I have a few Shenandoah National Park trail reviews to put up - as I mentioned in a post last week I finally completed all of the "Easy Day Hikes" in the Gilbert book.  On the final day of my vacation, I went out to check the box on the last two hikes, and as I started the first one - the "Traces" trail, I saw an opportunity to take a quick altitude measurement and compare it to the NPS map at the trailhead - shown here - where the altitude was reported as 2,710 feet.

I took the short walk over to the little ampitheater - it was a cozy little outdoor place where they show movies and do ranger programs at the Matthews Arm campsites.  I took my reading at the stand where they usually put the projector.

As shown in the final photo, my watch read out 865 meters - roughly 2,682 feet.  The air pressure must have been optimal this time, because that is the closest reading I've had so far, only 29 feet, or 9 meters, off. 

I forgot to take this opportunity to set a reference altitude, so when I do the hike reviews for Matthews Arm and Bird's Nest Summit, I may not have a correction factor for those posts.